

My wild guess is the term web3 and building on the decentralised web is no longer news to everyone, 2021 saw the mass adoption of blockchain development with projects such as Aave, Opensea, Uniswap and others Web3 platform doing tremendous numbers. Making a paradigm shift from web2 to web3 shift seems to be difficult transition, I wrote an introductory piece to Web3, you can read about it to gain more insight.

Getting Started: What are we building?
We're going to be building a platform where users can purchase a Token and then get a special NFT as a reward for trusting us and purchasing our token, the reward they get will be vary based on the number of token purchased, the more the tokens the higher the value/rarity/speciality of the NFT they get. Now the interesting part is the reward will be from an NFT Lootbox, so it going to be randomly selected. Just like in your games, where you unbox a random character. Our project is simply focused on Monuments, according to Wikipedia
A monument is a type of structure that was explicitly created to commemorate a person or event, or which has become relevant to a social group as a part of their remembrance of historic times or cultural heritage, due to its artistic, historical, political, technical or architectural importance.
Monuments are remainders of great deeds done in the past, all monuments are preserved in the mind as memories and ancient monuments possess a lot of wisdom and history. Our project and token (MNM) will be used to ensure the creation and preservation of monuments.
BTW if you’re not familiar with NFTs, According to ARTnews
An NFT, which stands for non-fungible token, is a unique unit of data employing technology that allows digital content—from videos to songs to images—to become logged and authenticated on cryptocurrency blockchains, primarily Ethereum.
The cool thing is that even though our platform will be the one rewarding users with them, they’ll be owned by the user and not locked to our app and each NFT received by an individual can be used as ticket pass to go visit the monuments.
By the end of it, you'll have a launched a token and created an NFT Lootbox system. So it is going to be an interesting project, so put on your seat belt and let's go on this beautiful ride.
Requirements
They are some tools we need to build our project, one is Metamask which is a crypto wallet & gateway to blockchain apps for accessing and interacting with DApps. Download it as a extension to your chrome or brave browser and follow the prompt to set up an account.
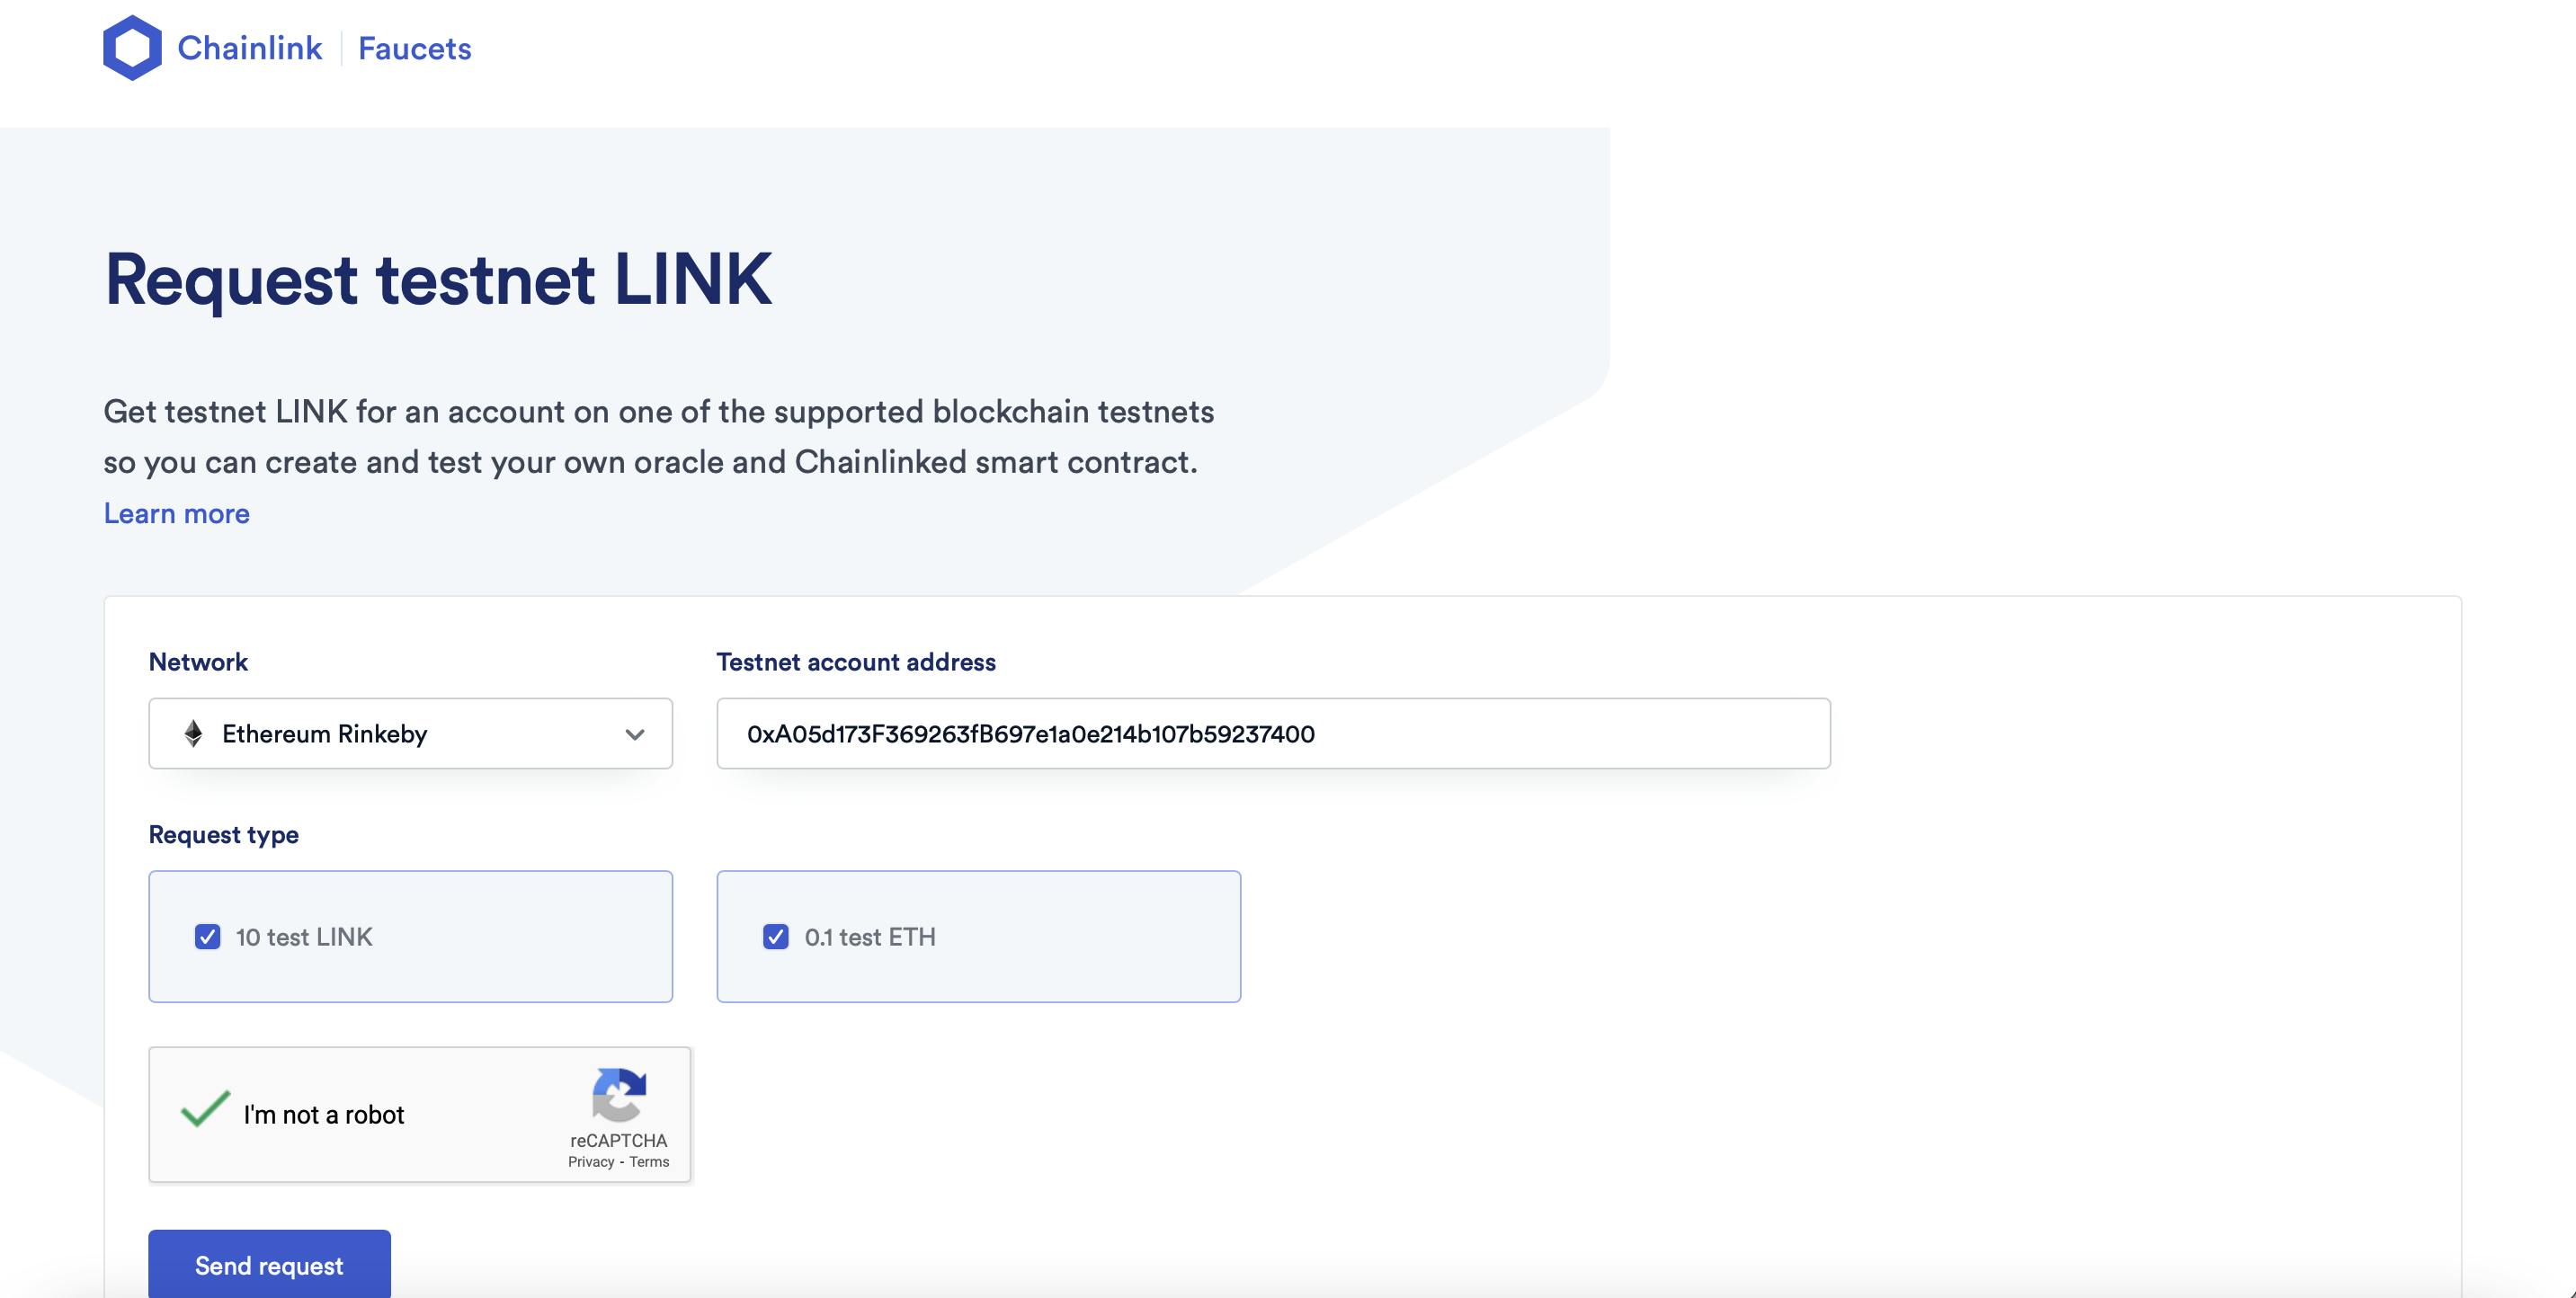
We'll be using a Rinkeby Testnet for this project. If you just installed metamask, click on settings and go the advanced and check show testnet network. Now, let’s see how to get free Ether for Rinkeby Test Network from Chainlink Faucet open up MetaMask window, click on the 3 dots and then click on “Copy Address to clipboard” to get your address.
Why thirdweb?
Thirdweb makes developing web3 applications faster and easier. Thirdweb has created Smart contracts you control, Tools that accelerate your workflow and Intuitive SDKs and widgets for developers. They’ve written a bunch of really cool smart contracts which we can deploy, own, and control. Each module lets you finely tune permissions to control who can access your modules and modify settings. In this guide, we’ll use these contracts vetted by Thirdweb and won’t need to write any smart contract code ourselves! cause no need to re-engineer the wheels, thanks to Thirdweb, our development process is hereby fast tracked.

We’re also going to use their Intuitive and Interactive Dashboard to create our contracts and Lootbox Modules while we use their well documented SDK to interact with the contracts from our web app, which is very seamless and straightforward. It's truly a joy to use.
To gain more information and access, I'll advice you join their Discord, they’re really friendly and helpful! Freee feel to DM abe#0007, AnastasiaAn#9444, ap#2471, Waren Gonzaga#0168 and nachoiacovino#4022
Initiate Our Project
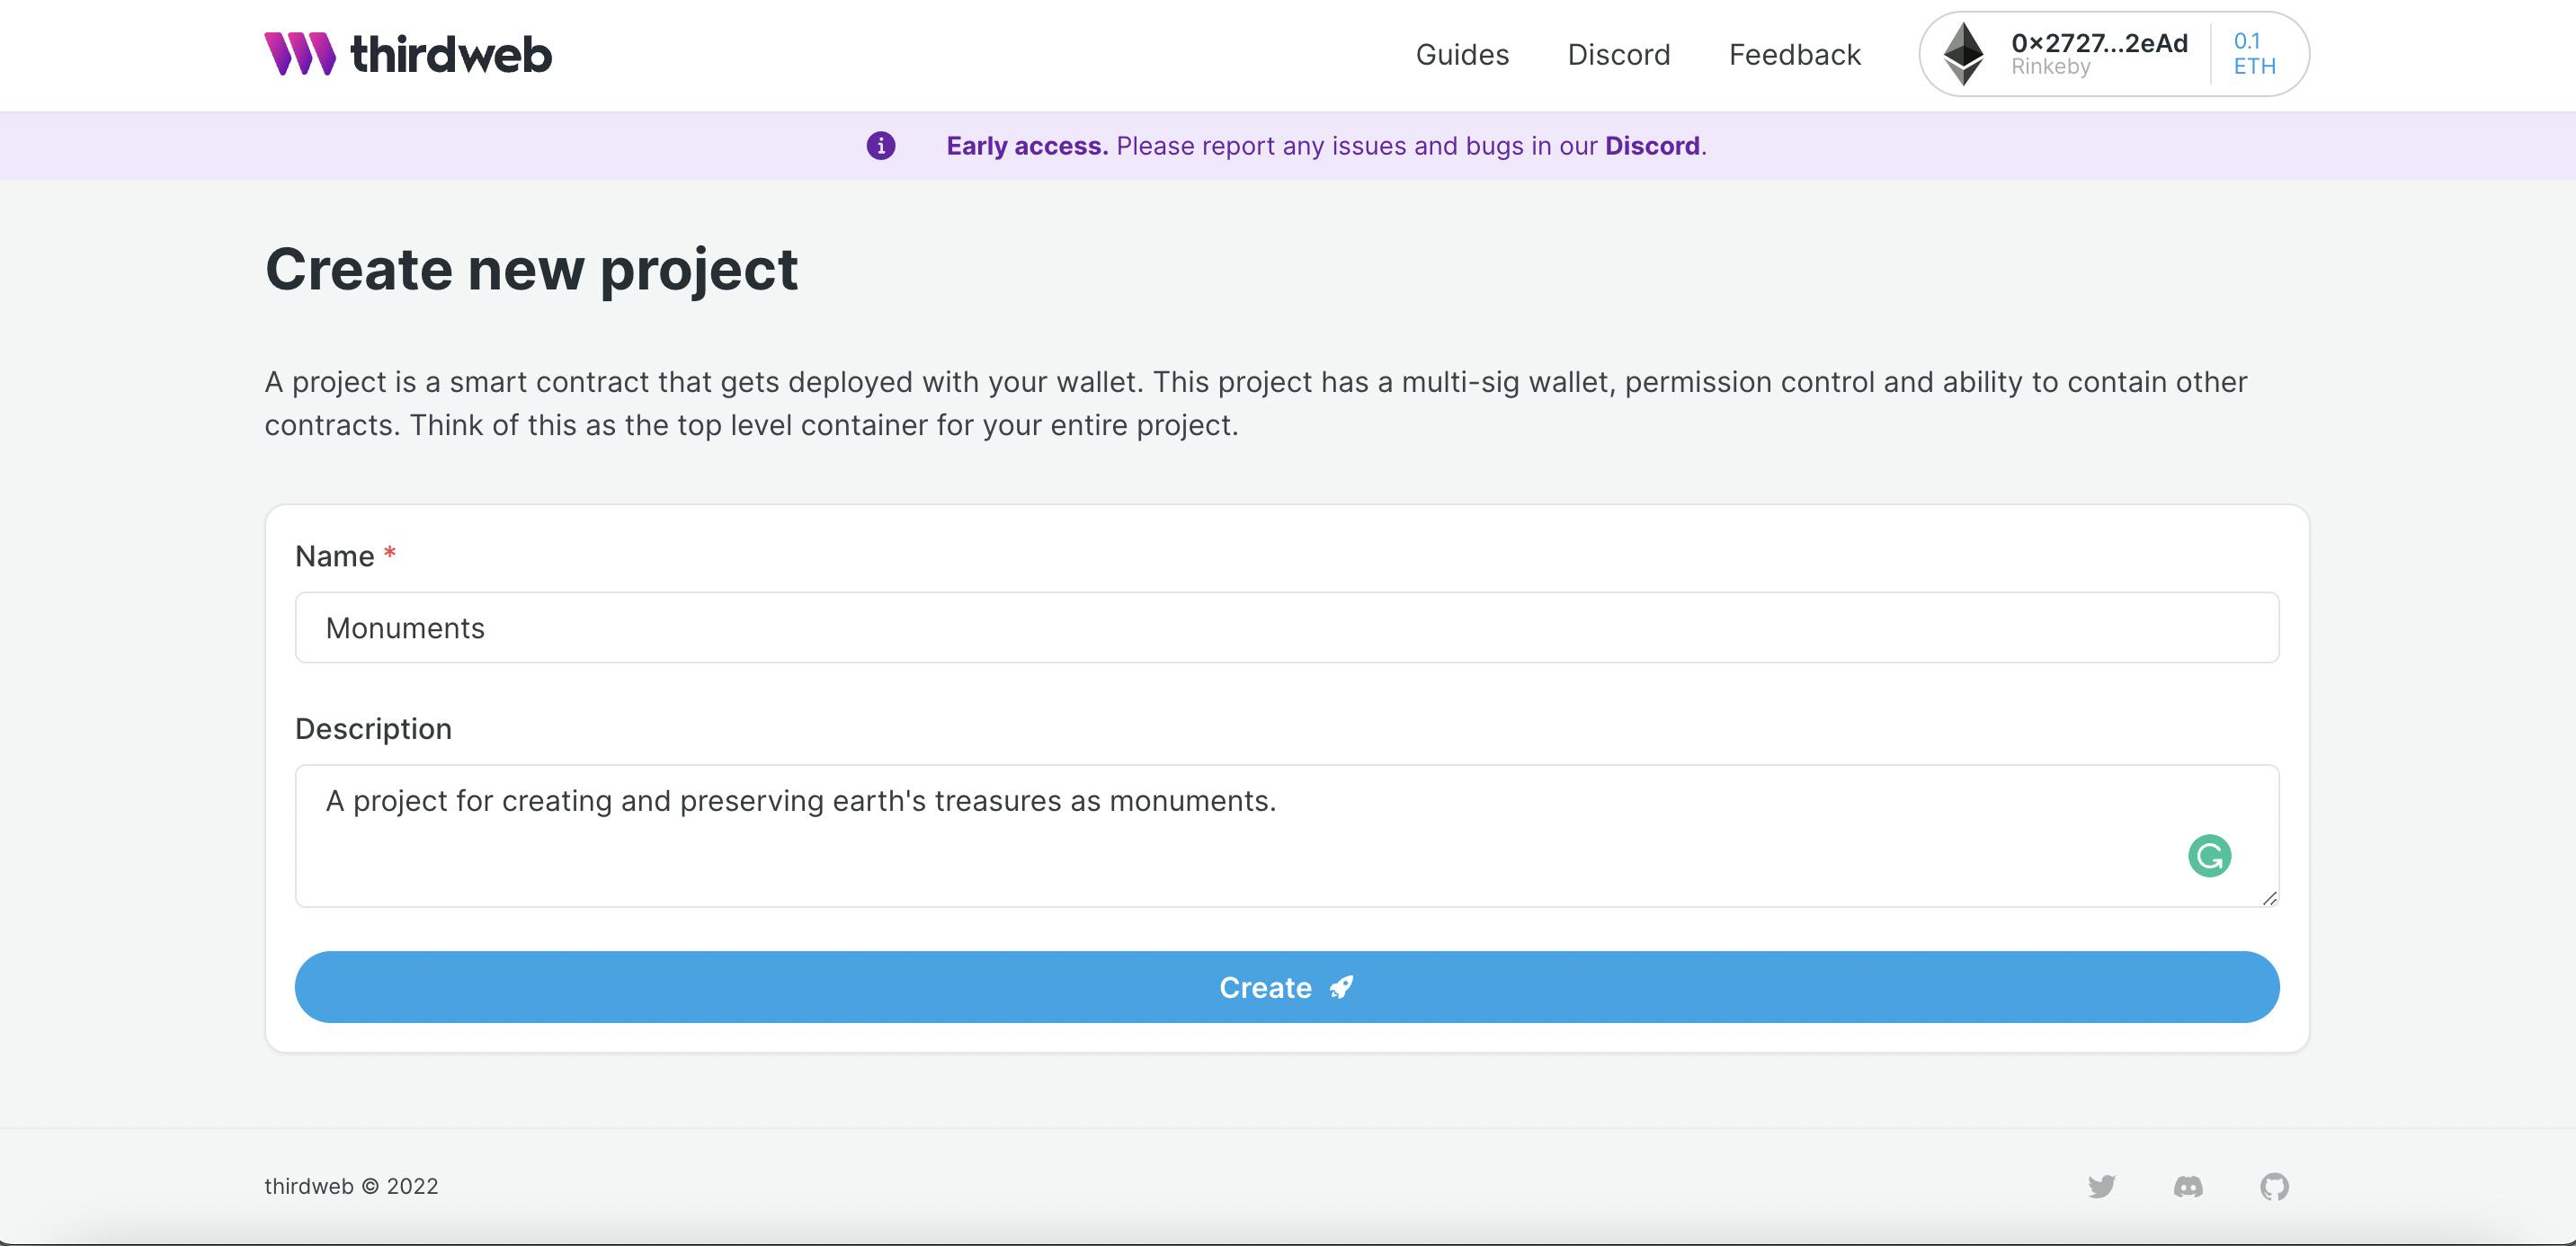
Now let's start by creating a new project with Thirdweb, select the Rinkeby testnet(for the sake of our project), follow the prompt and get access to your dynamic dashboard and set a new project, ensure your are connected with the account you used to request the test ether.
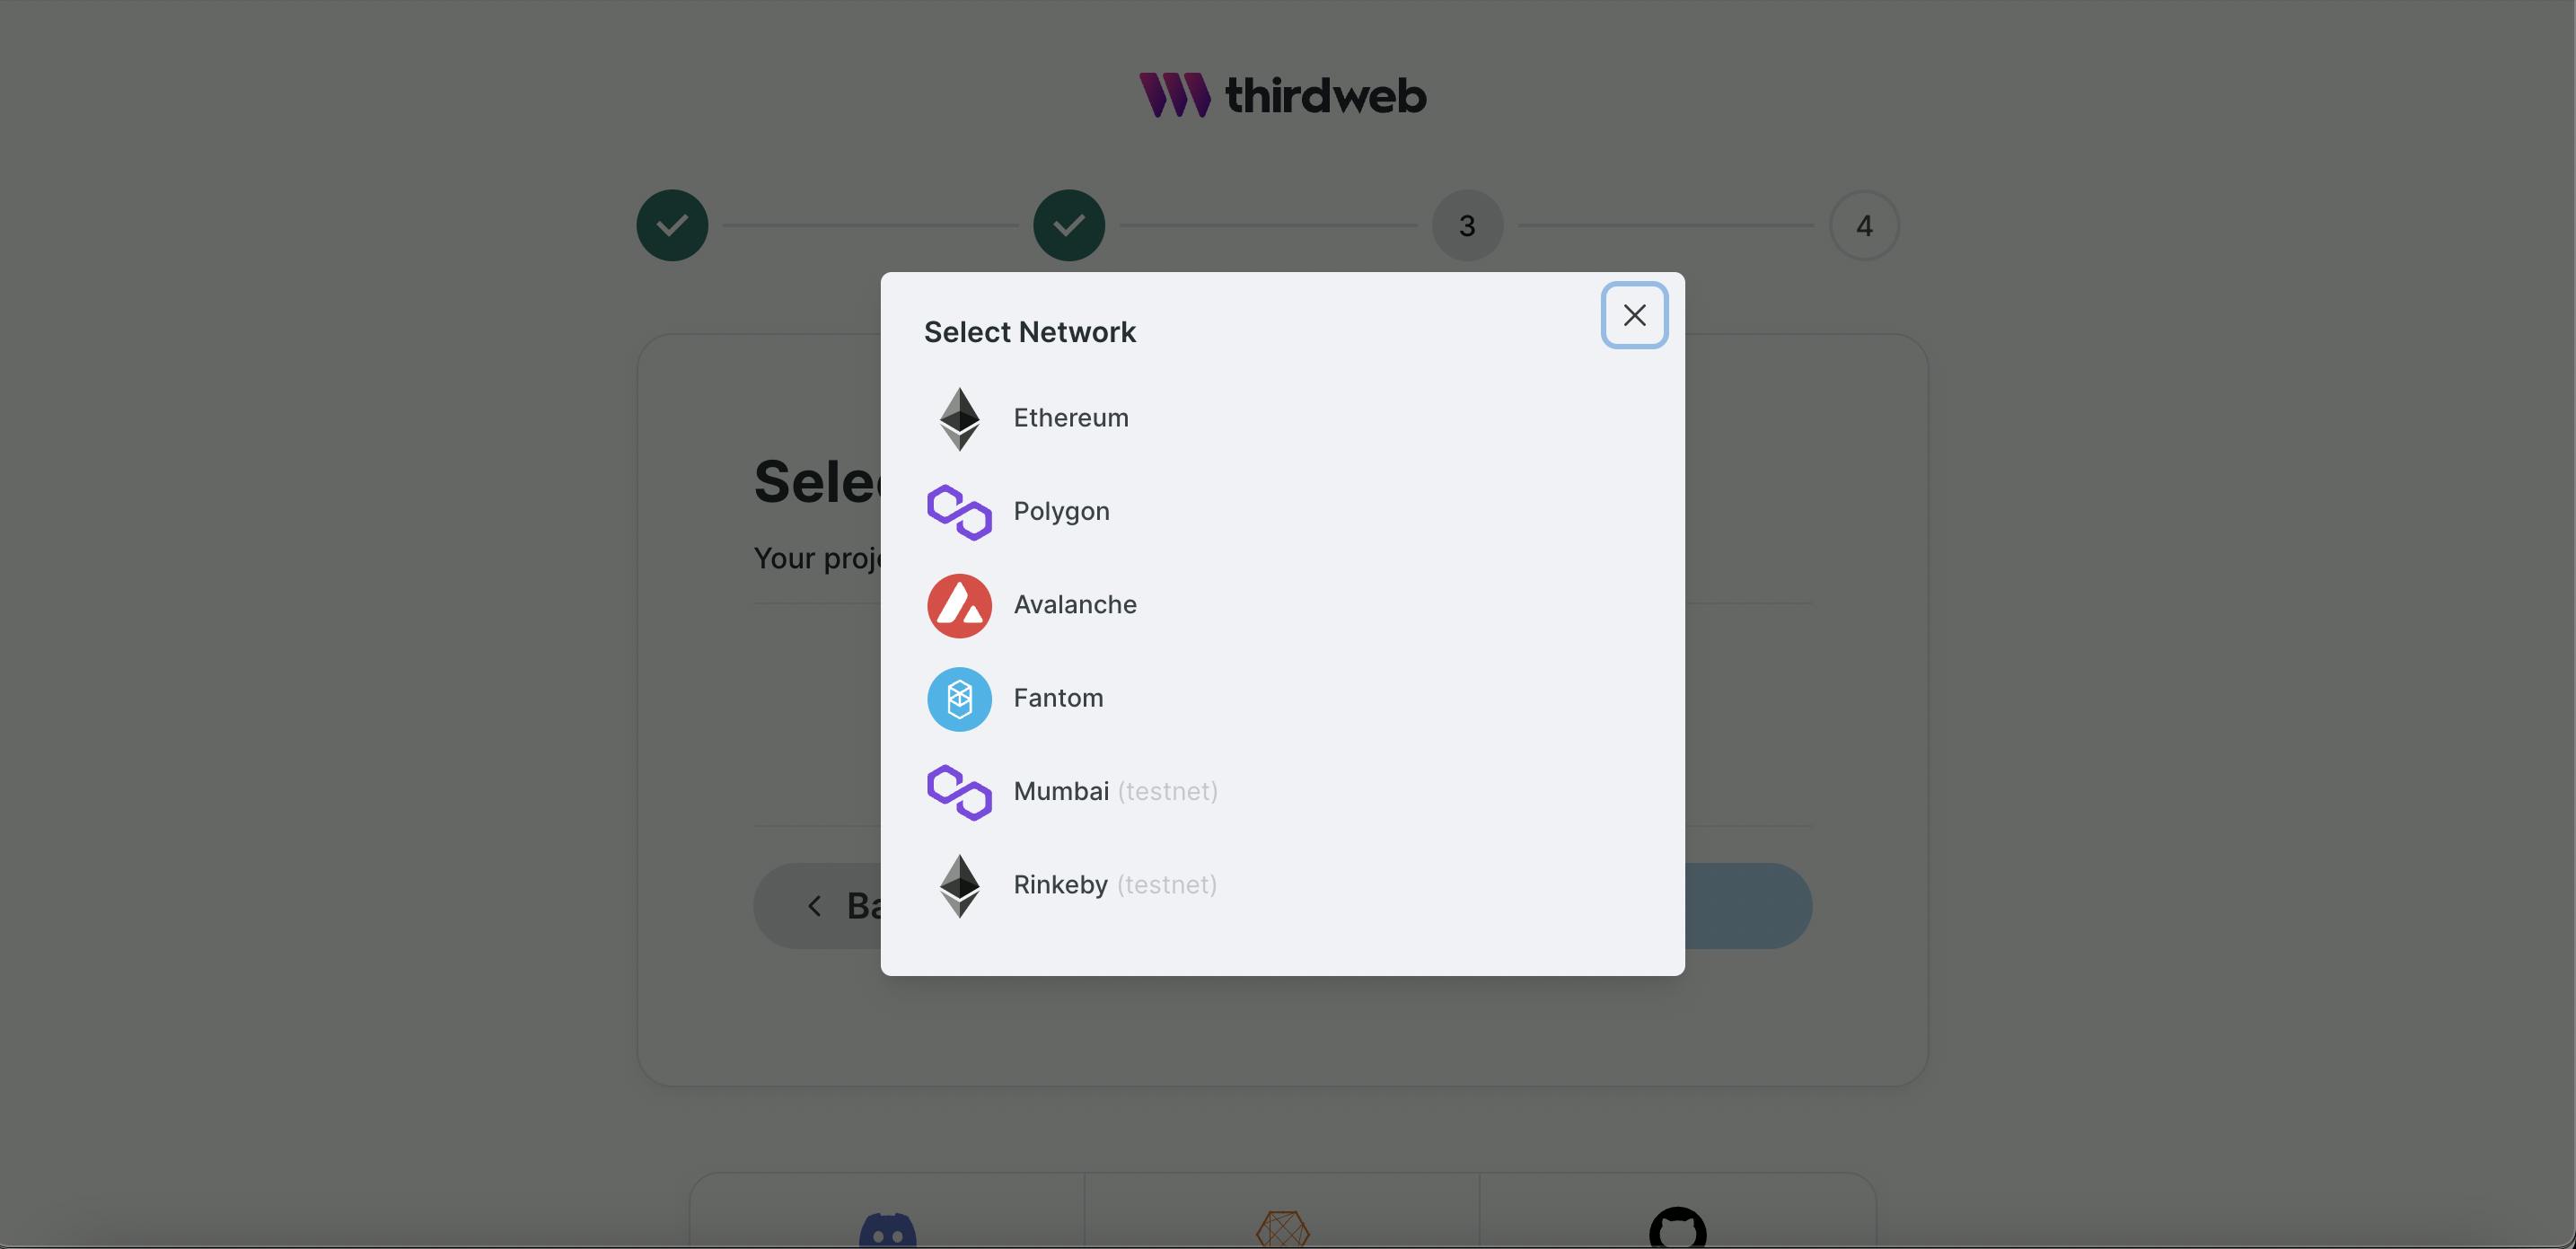
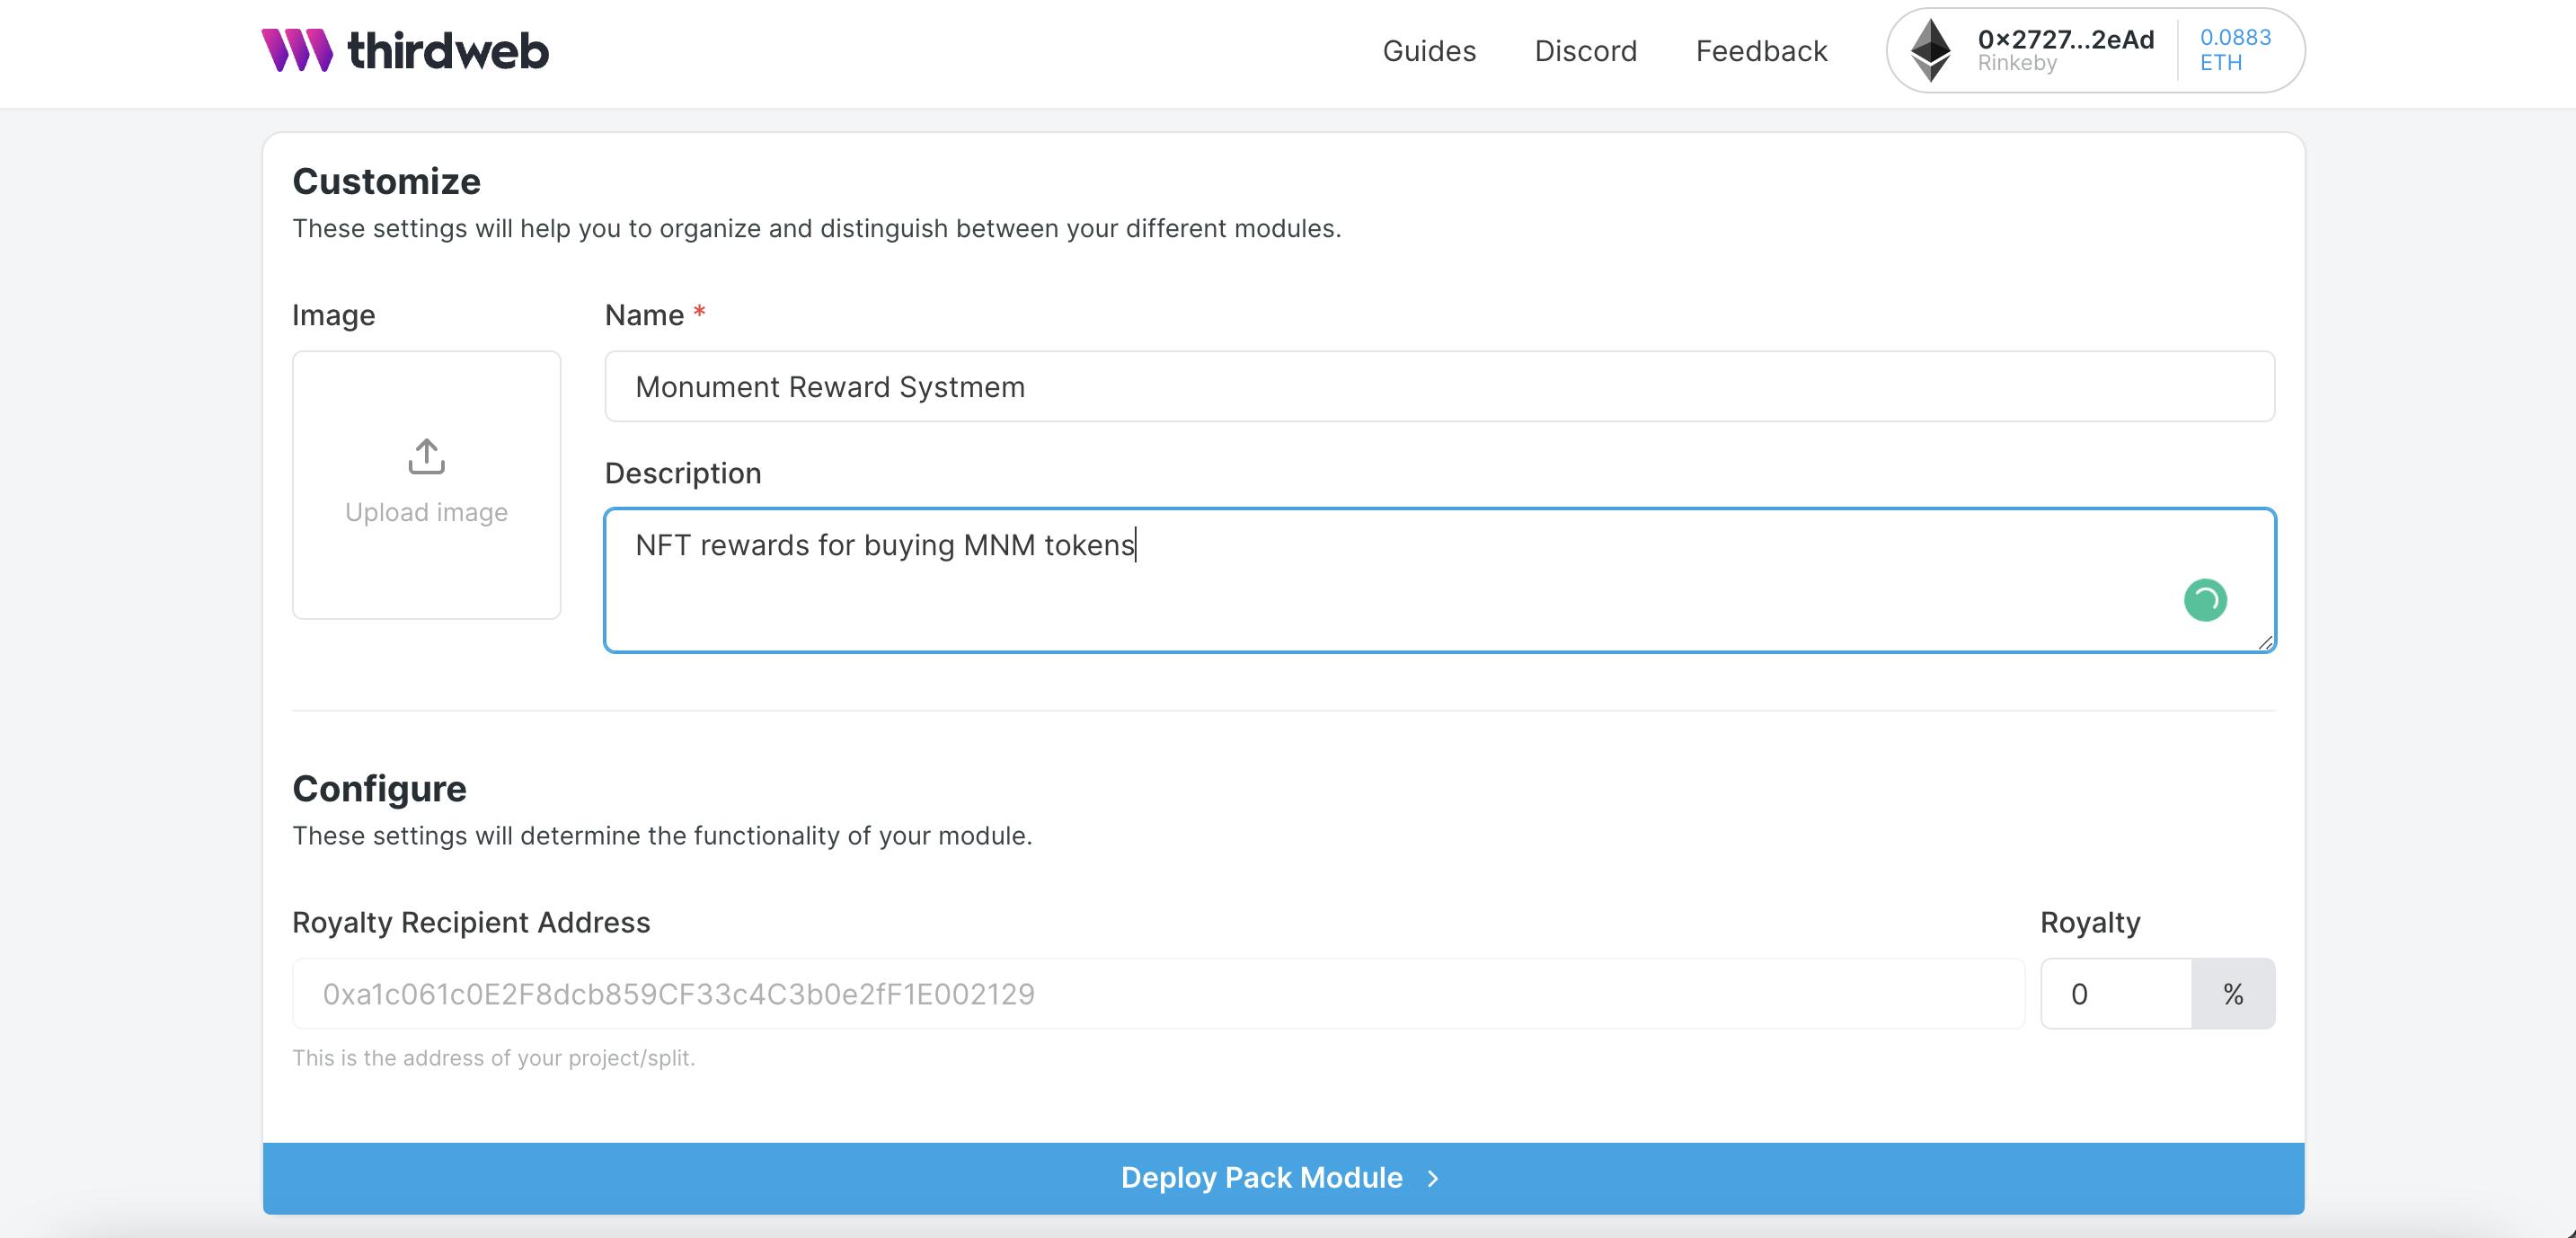
Thirdweb offer support for Ethereum Mainet, Polygon, Avalanche, Fantom, Mumbai Polygon Testnet and Rinkeby Testnet. Enter the name of the project and a brief description of the what the project is all about, you can reference the image below. This is like creating a new react or Laravel app but this time Thirdweb is taking away all the hassle and makes it very easy and simple.
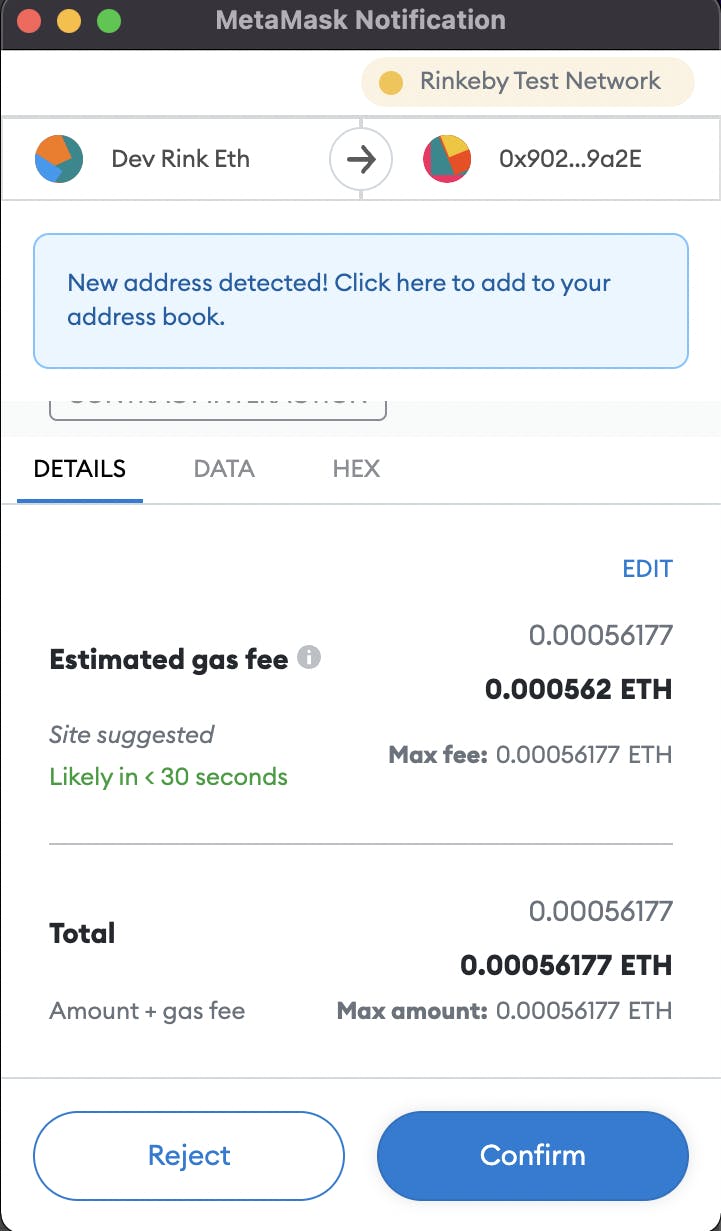
 In the course of building this project you'll be constantly prompted to sign some transactions, which is the reason we had to start by getting some test ether. To know more about Transactions on Ethereum, kindly check out the official documentation.
Create Our Token
The next thing to do is to create a Token(ERC20) for our project and this can be done by simply adding a module to the project. It is a three step process:
- Click on Add module
- Select Create NFT and token from the options.
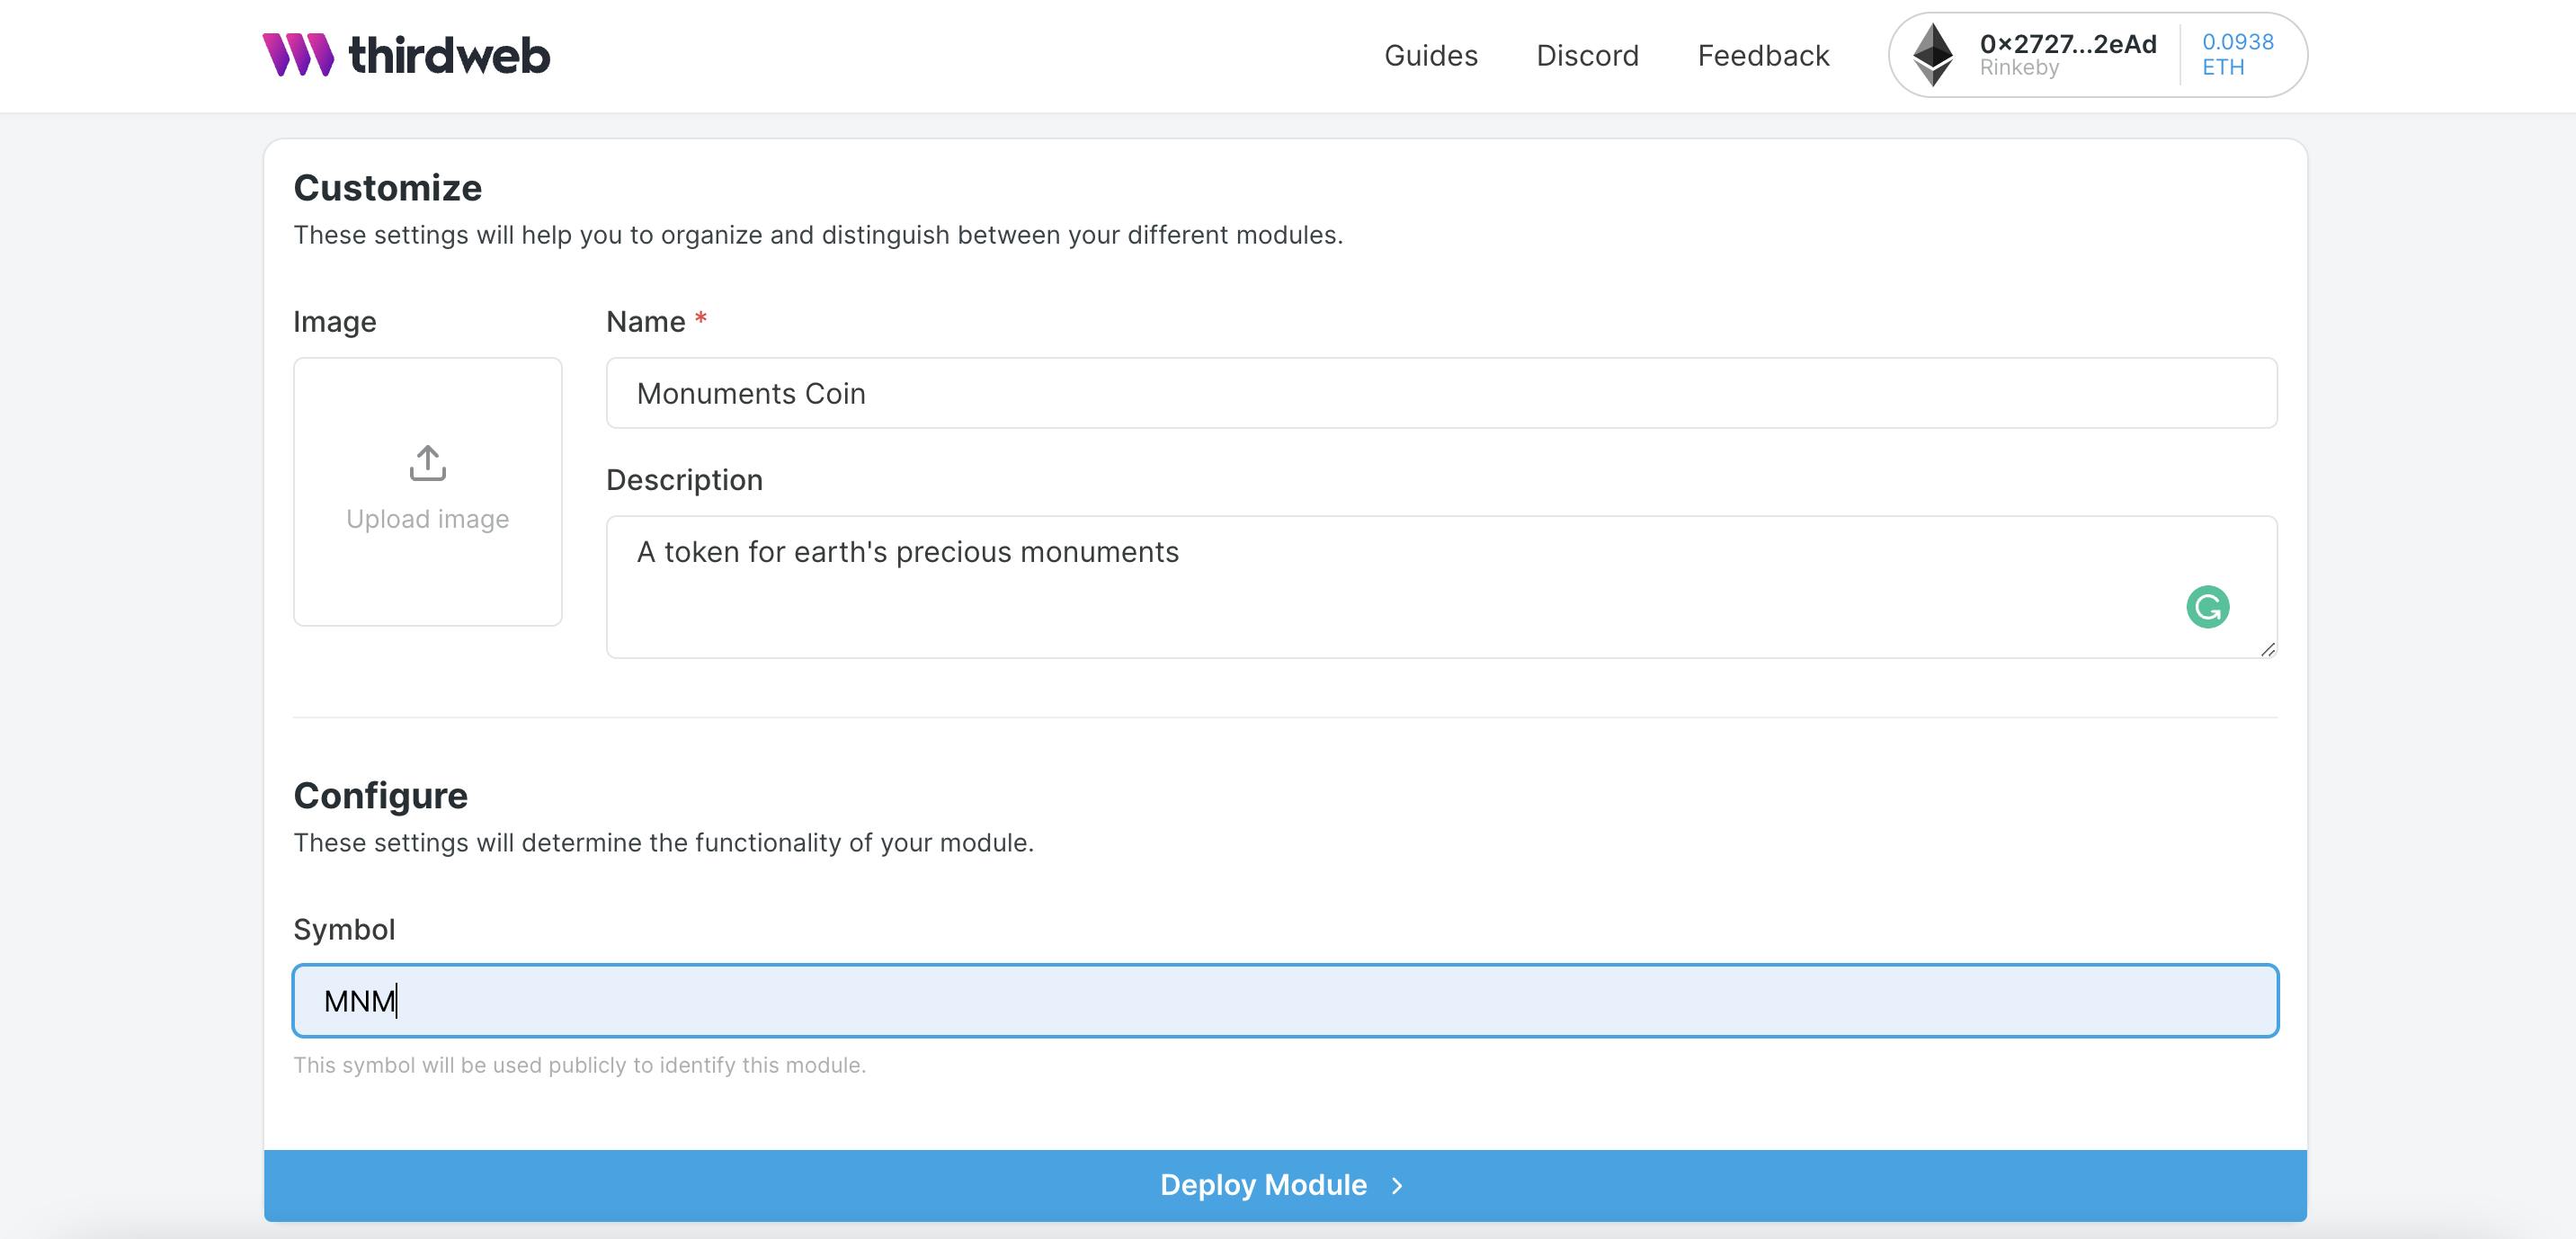
- Select Token(standard token or cryptocurrency)
Enter the details the token, with details such as name and symbol which will serve as a means of identifier for the token created, follow the default options for the permission and deploy the module.
Congratulations 🎉🎉 you've just created a token without writing a single line of code.
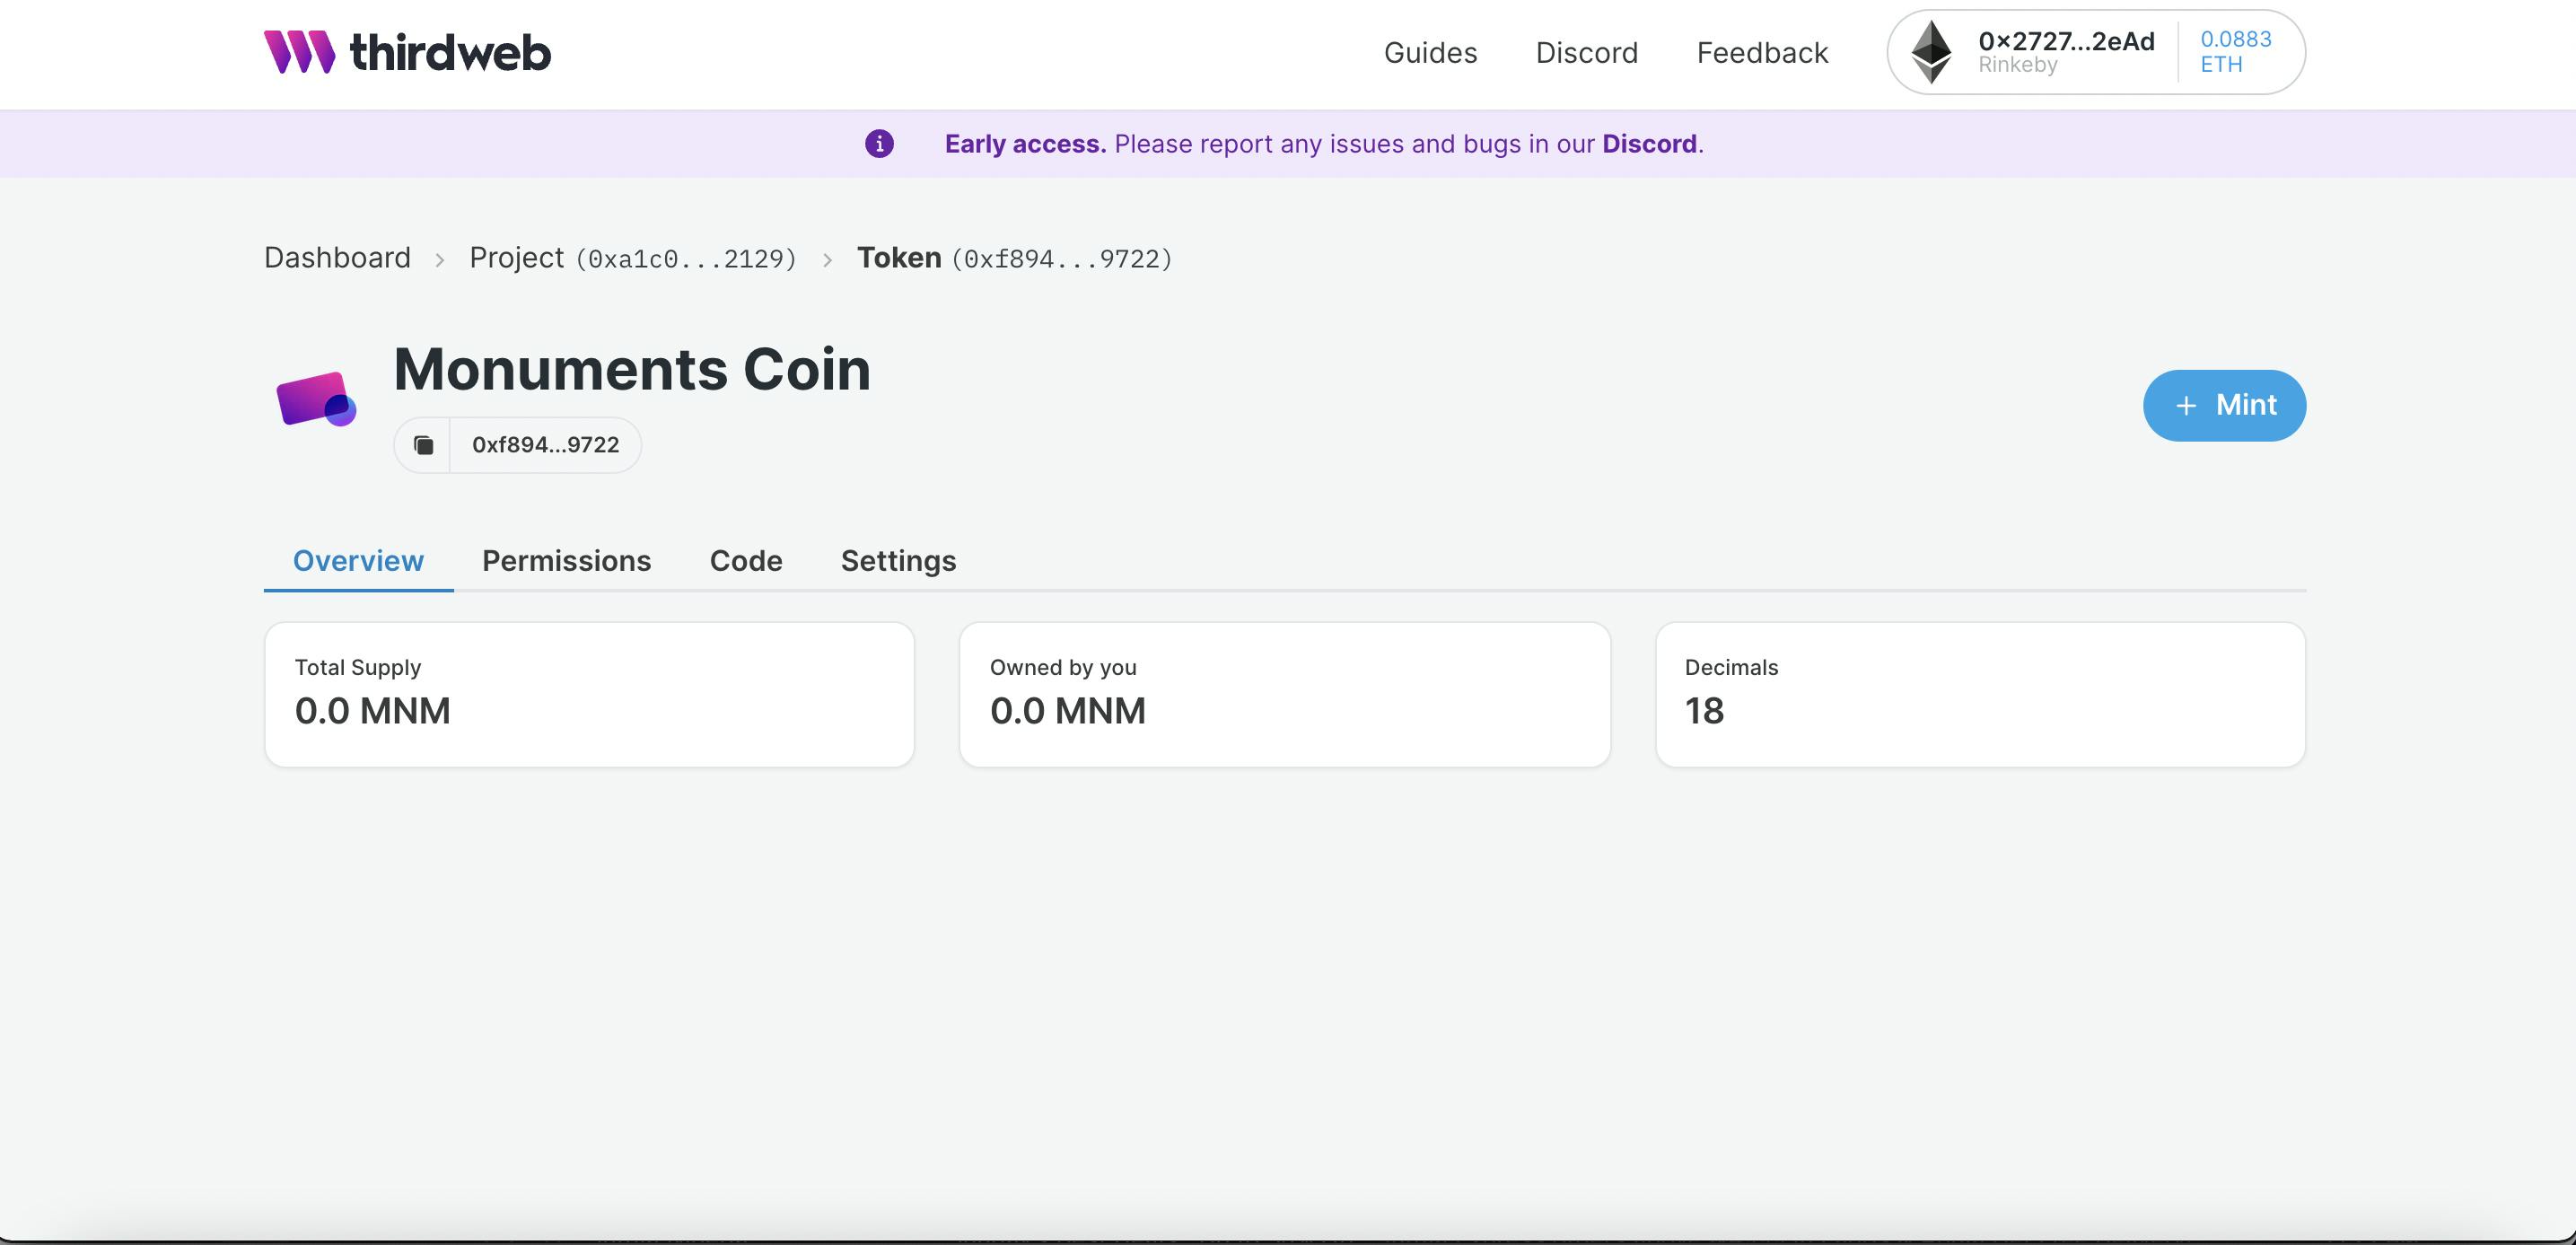
If you copy the address the of the module and check on Rinkeby Etherscan you willl see It has been recorded on the blockchain. Now let's move to an even more interesting part, creating the NFT Lootbox to rewards those who buy or mint out token.
Setup NFT Lootbook - Pack
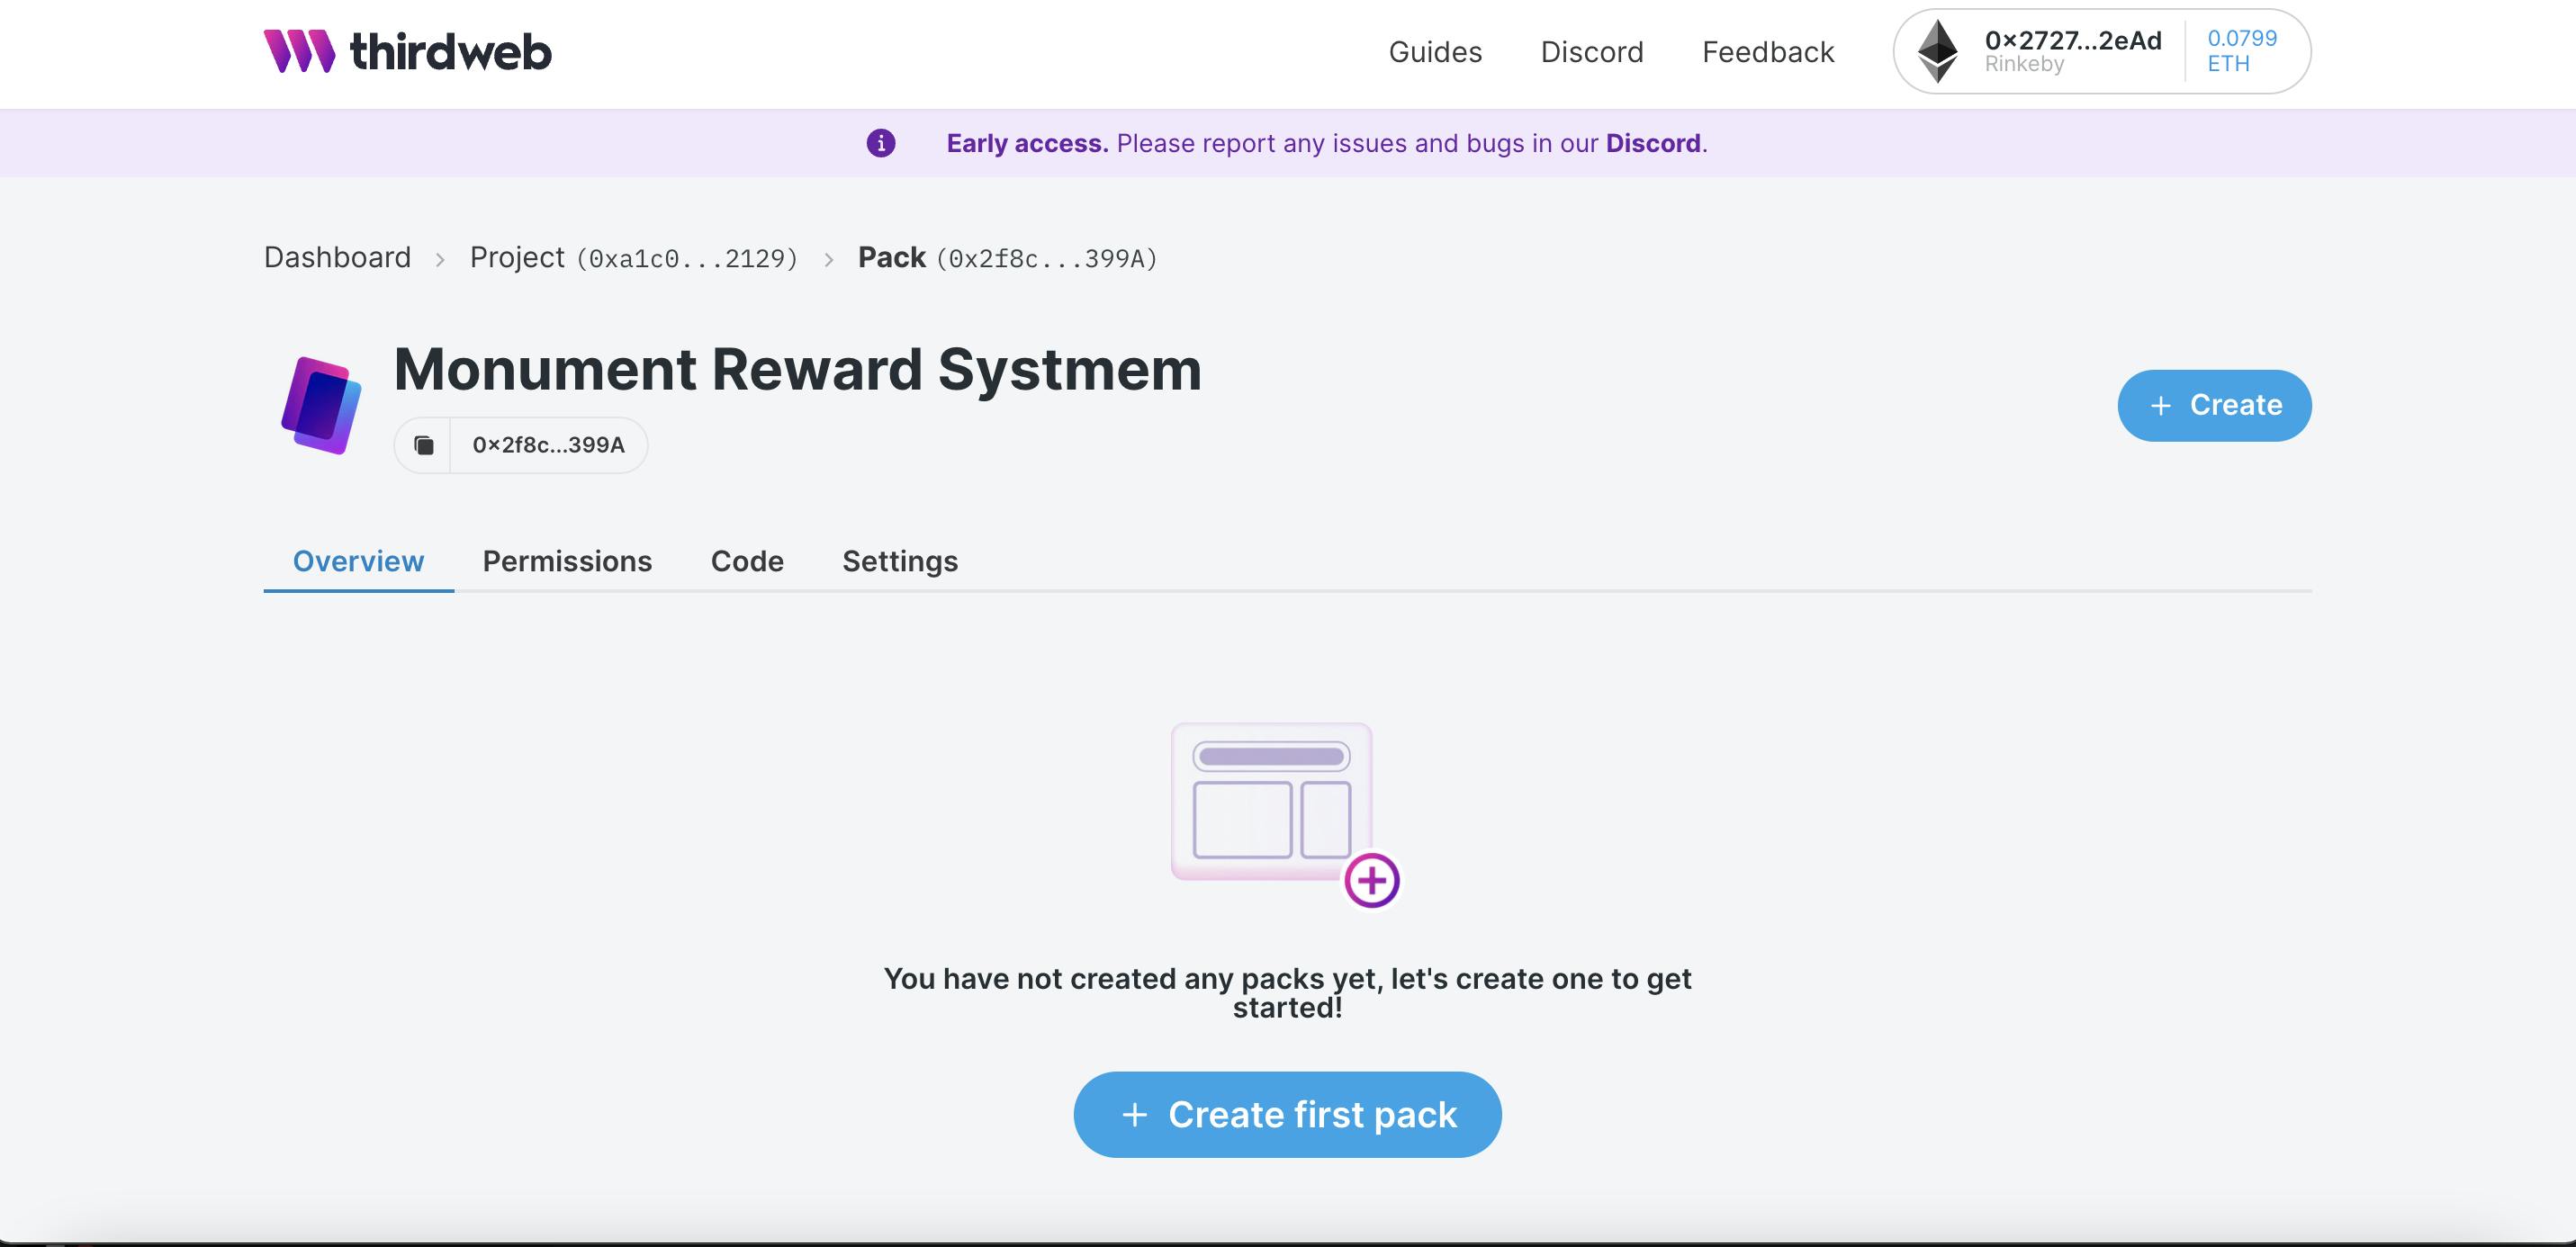
Over to creating the NFT Lootbox for our Reward system, go back to your dashboard and select the monument project you created, to achieve this we need to add a new module(pack), this is just like a house for the mystery boxes we'll be creating.
- Click on Add module
- Select Create NFT and token from the options.
- Select Pack(Lootbox of NFTs)
- Setup Module
 Now we have successfully created a pack, but that's not all, we have to proceed to create the NFT Bundle - we'll explain that in the next section.
Add NFT bundle token
To fully use a Pack you need to create an NFT Bundle, this is a like a folder for all the NFTs you want in a particular pack. Let's create the NFT bundles, in our case we need 3 bundles, first for those who buy/mint 0-100 tokens, second for those that buy/mint 101-500 tokens and lastly for those who buy/mint 500+ tokens. To create our NFT Bundle you can simply from the Pack tab, click on Creat First Pack which will prompt you to add a NFT Bundle(You need to create a bundle module before you can create a pack!) or head back to your dashboard, select the monument project you created, then proceed
- Click on Add module
- Select Create NFT and token from the options.
- Select Bundle (Collection of NFT with many copies)
- Deploy Module

In our case we'll be using Ninja names to for the different levels Genin, Chunin and Jonin as the bundles names. Proceed to create the three NFT bundle modules.

Jenin will hold NFT of specialty and rarity values of 1-10, Chunin 11-25, and Jonin >25. A user who mints 50 can get an NFT with a rarity value of 9, while another user who mint the same box can get an NFT with rarity of 2, so just like a mystery box you don't know you'll get, just hope luck is on your side 😉. Next thing is Create the Individual NFTs.
Create Individual NFTs
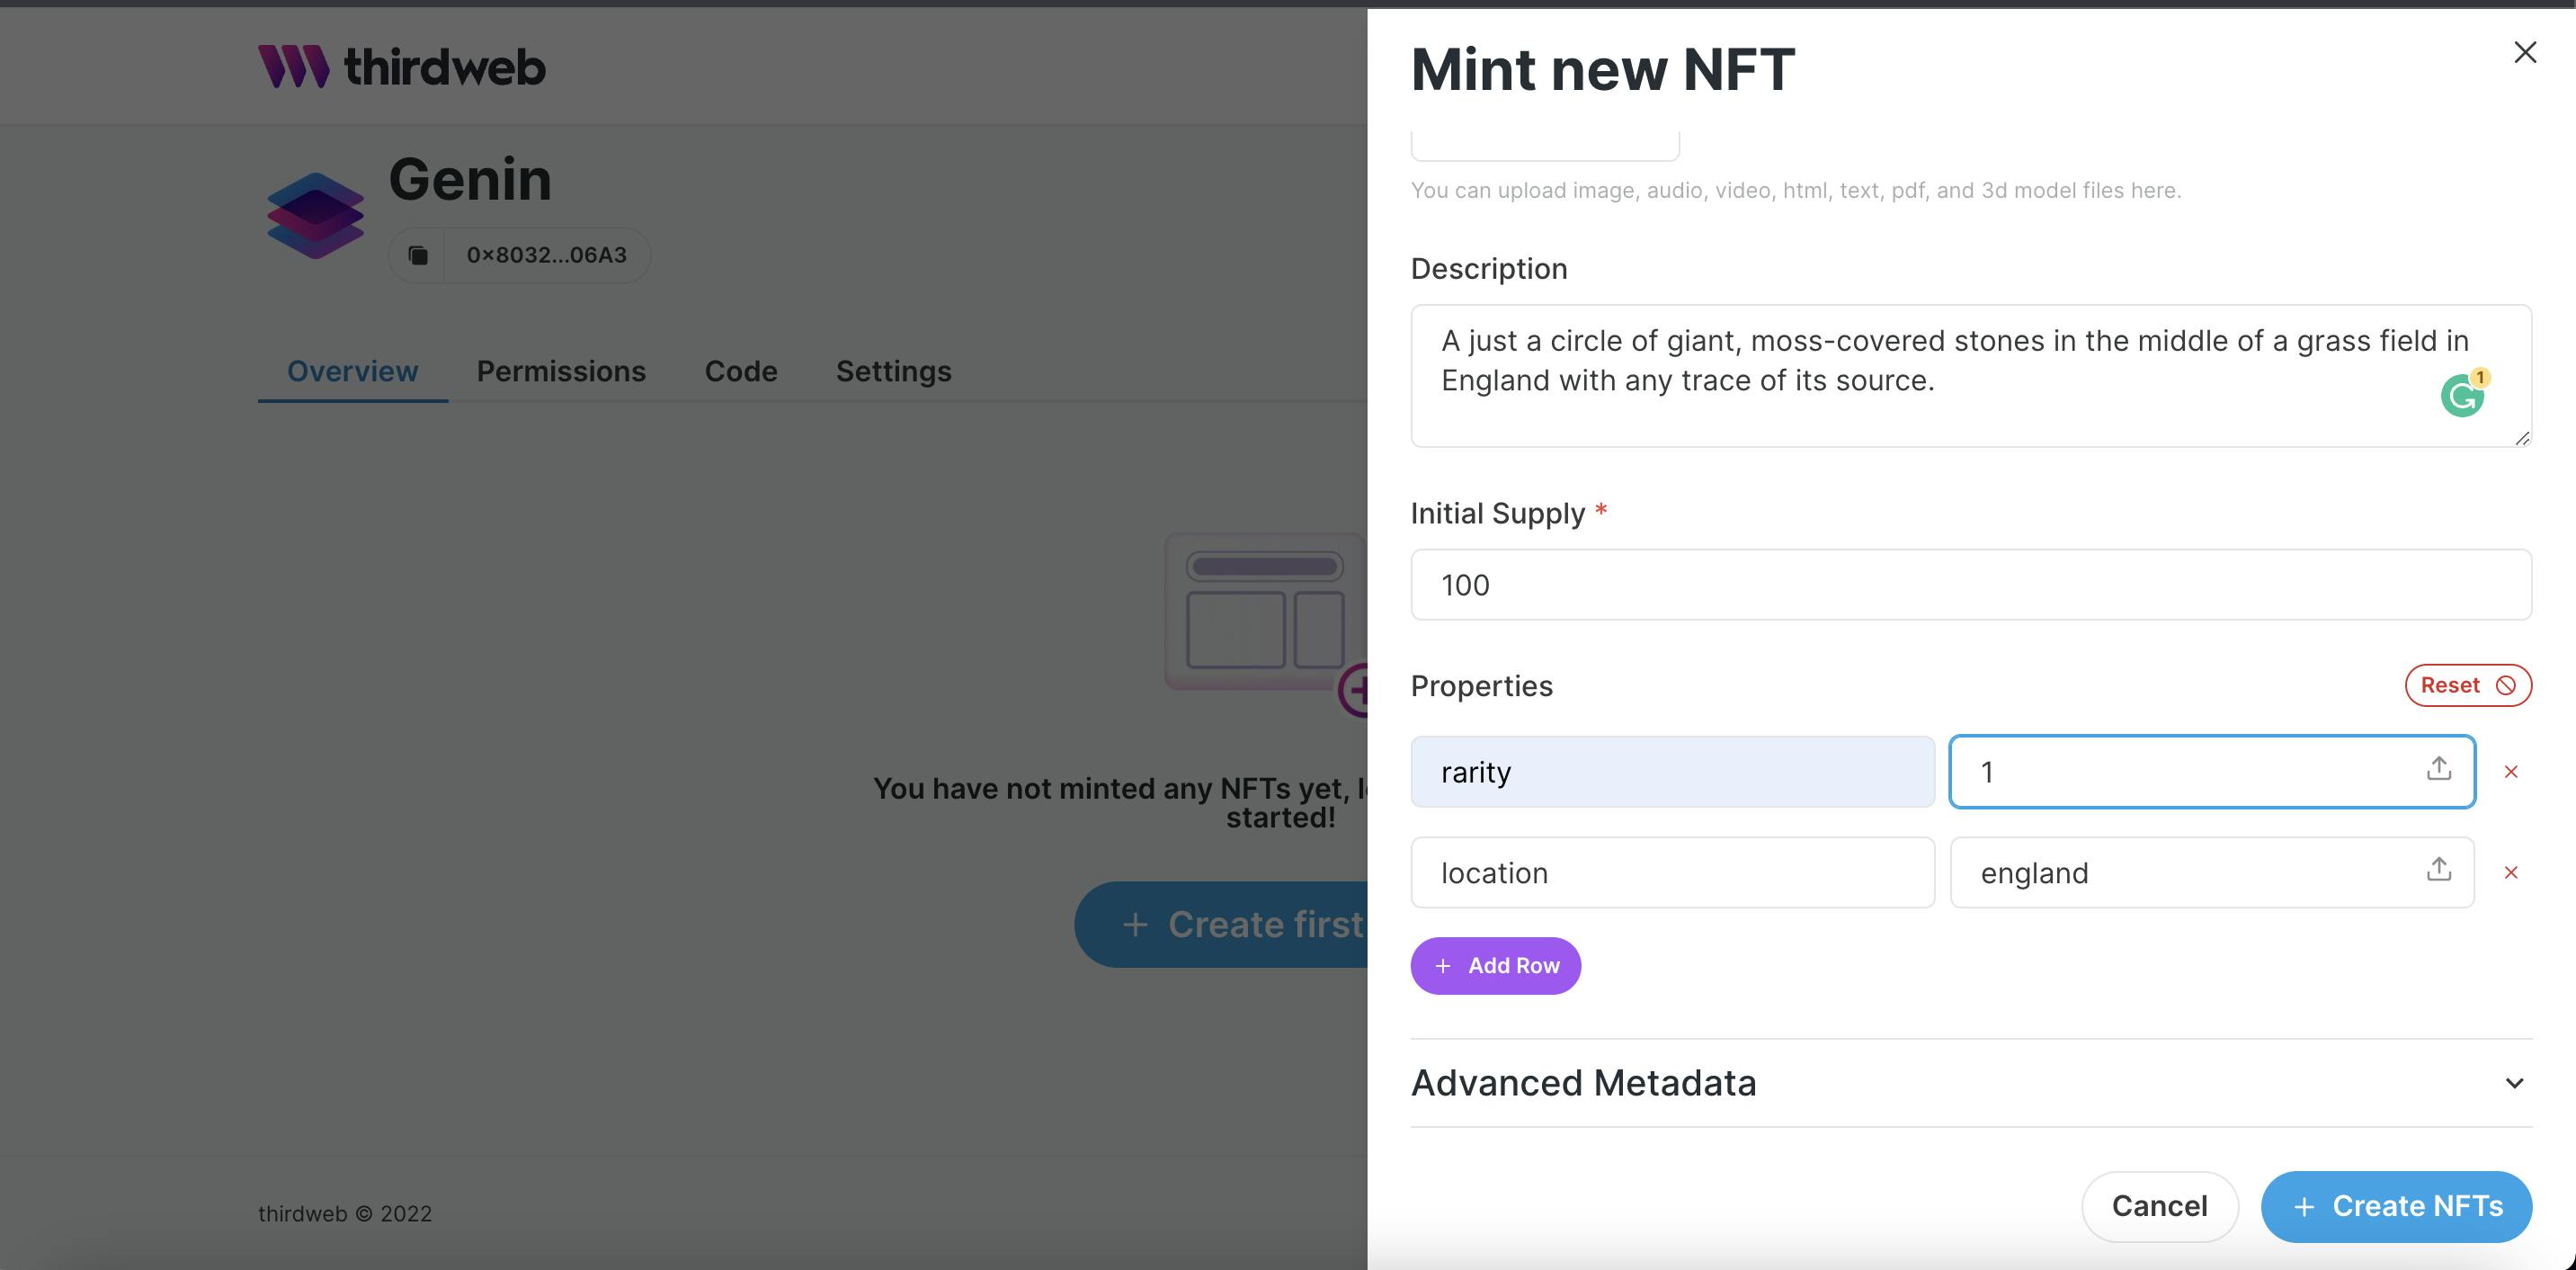
The rewards our users will be getting are NFTs(ERC-721) so let's create those NFTs, we'll create 5 NFTs for each bundle. To create the NFTs for our bundle, select the bundle and click on the mint button, enter and the details of the NFT.
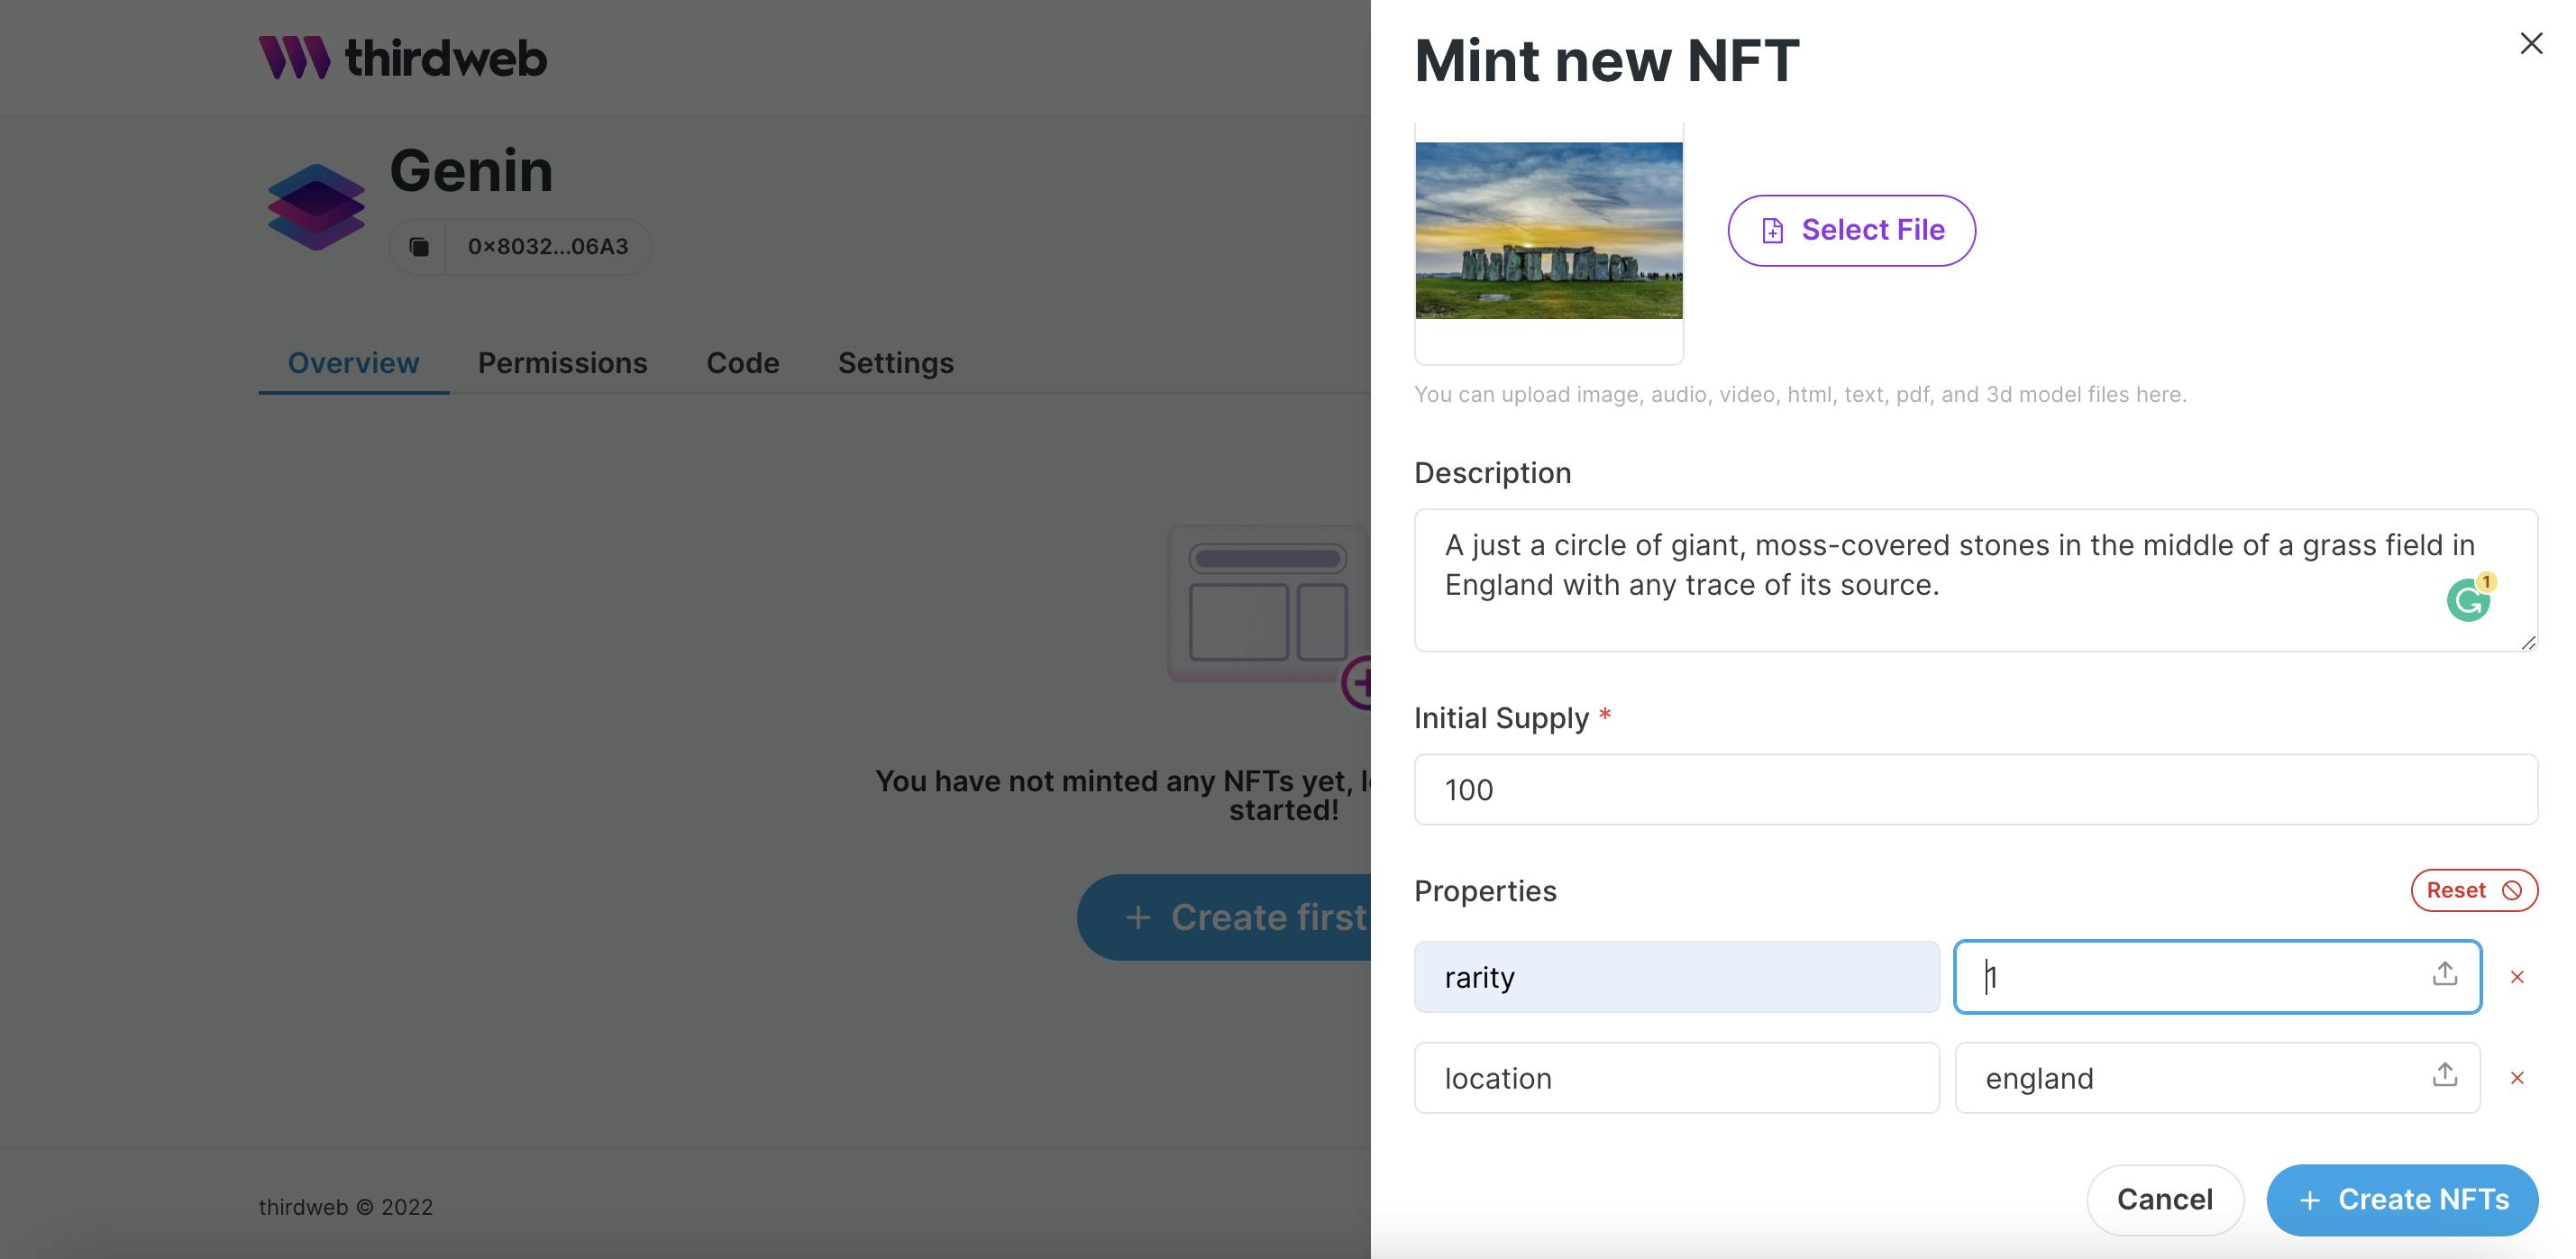
Go ahead to create some NFT for the three bundles you created, you can choose how many number you want in each bundle, to get idea of some monuments, check out this article. Set the initial supply to many unit of the NFTs you wants, 100 seems like a good number. For the NFT properties we can add the rarity of the NFT and also the location of the monuments.
Now let's complete the packing process, head to the monument project from the dashboard and select the pack module we created earlier. Click on create new pack and select on of the NFT bundles we created and tick all available NFT in the bundle.
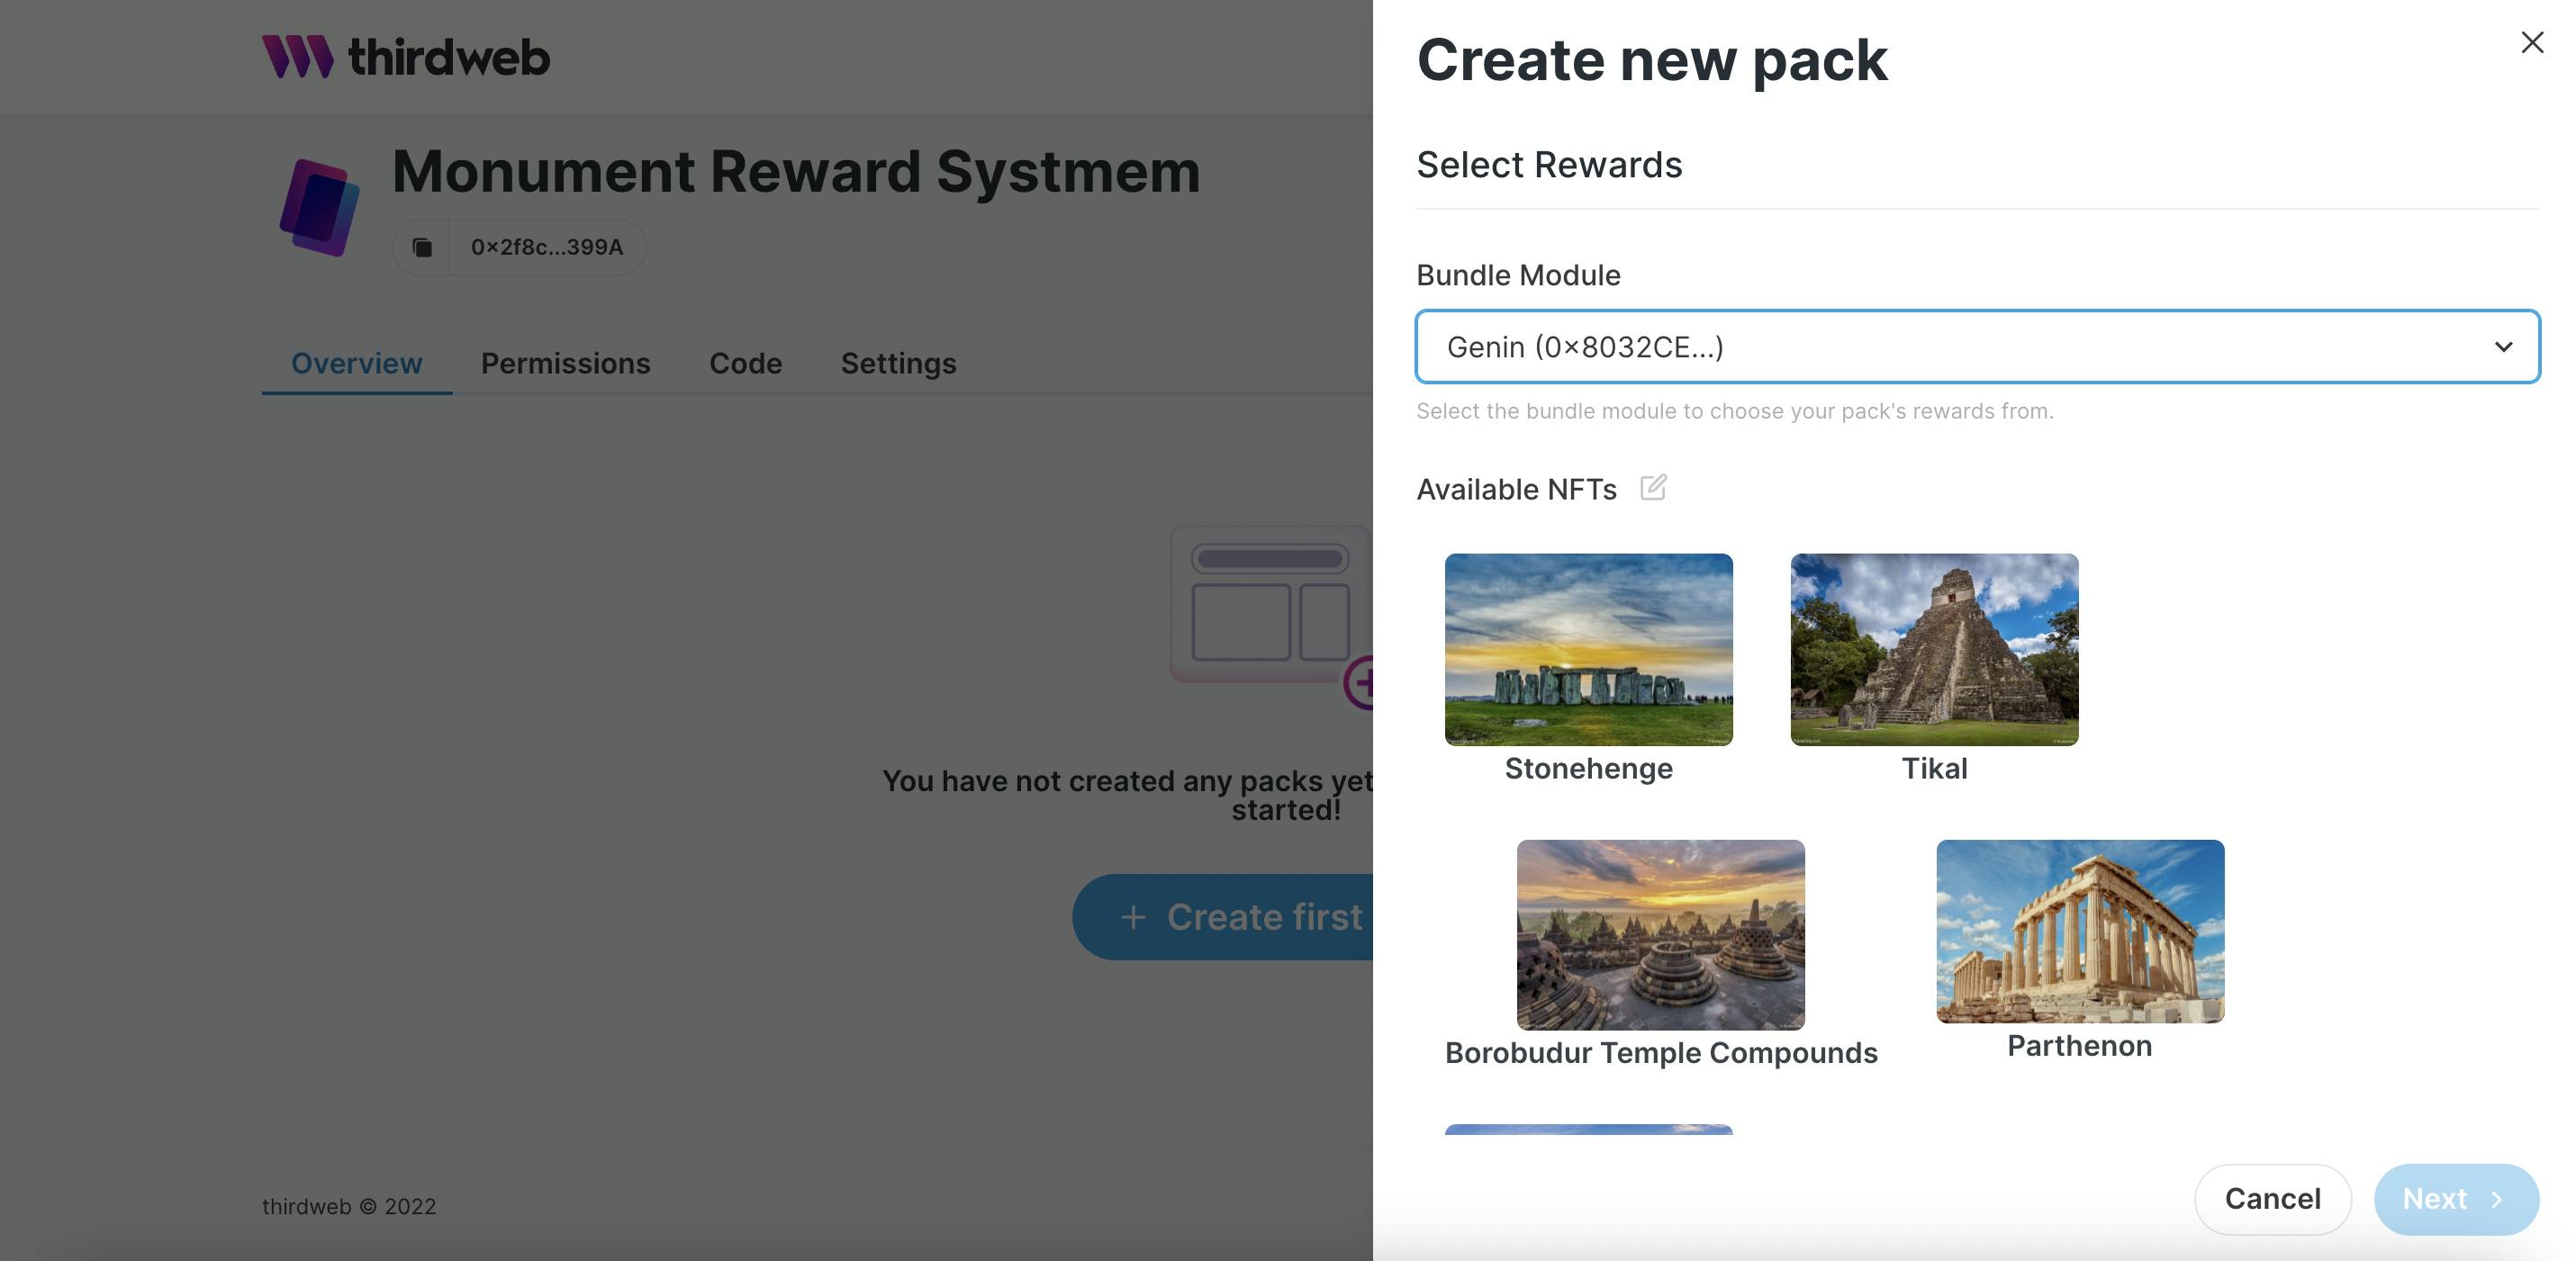
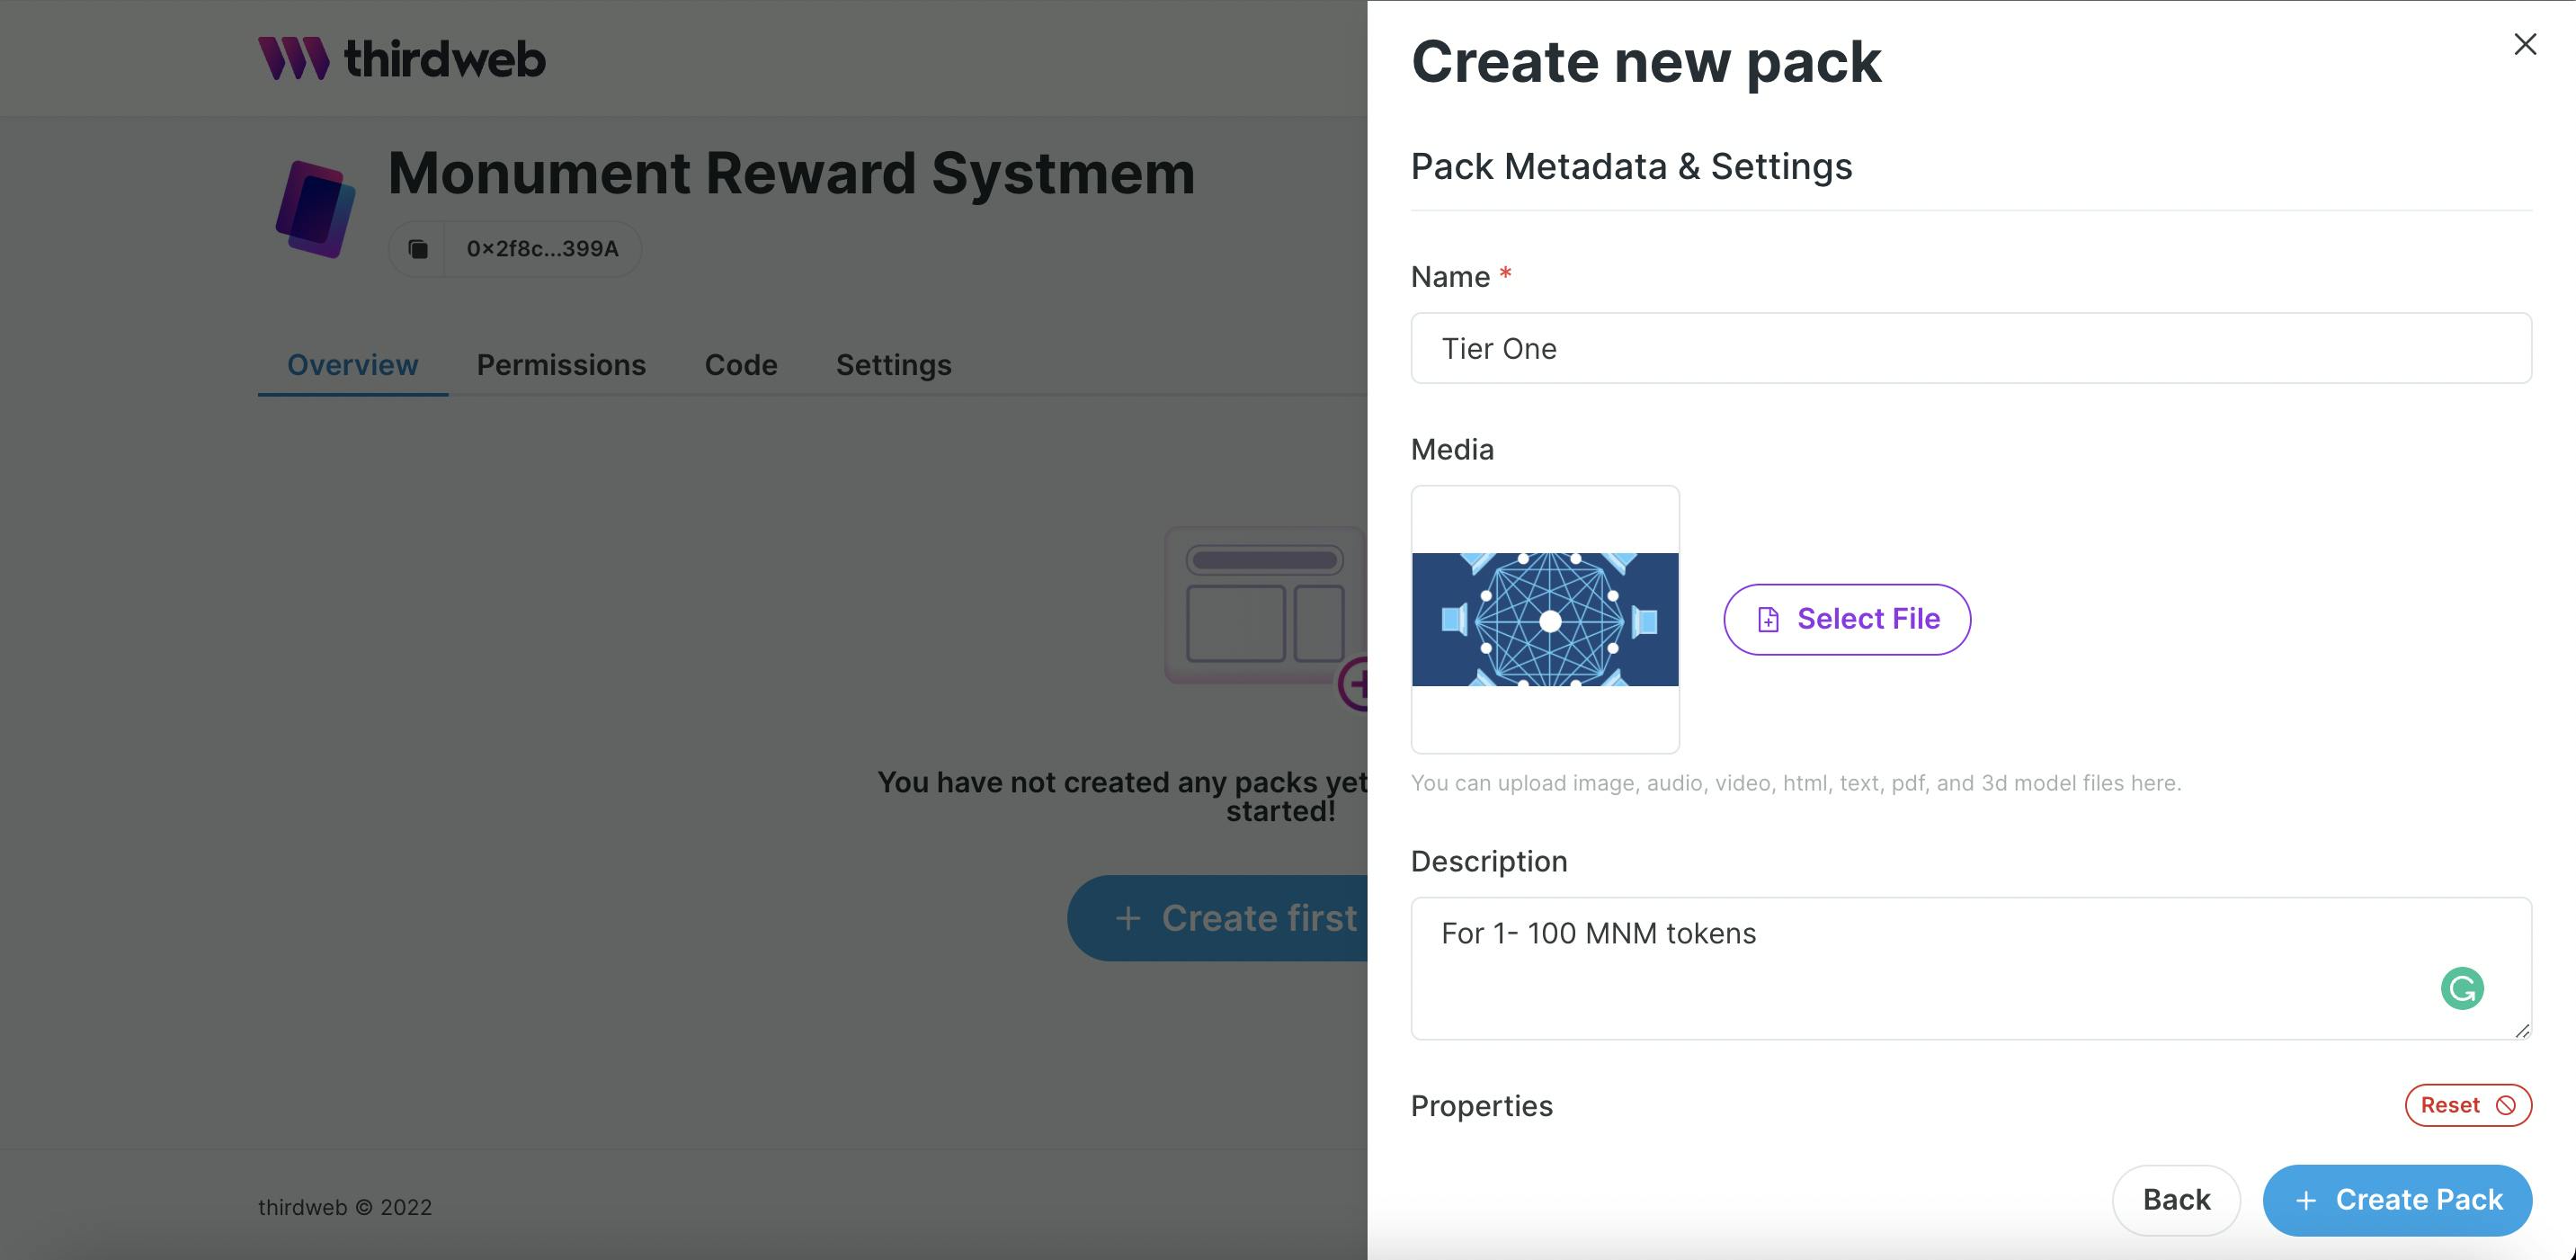
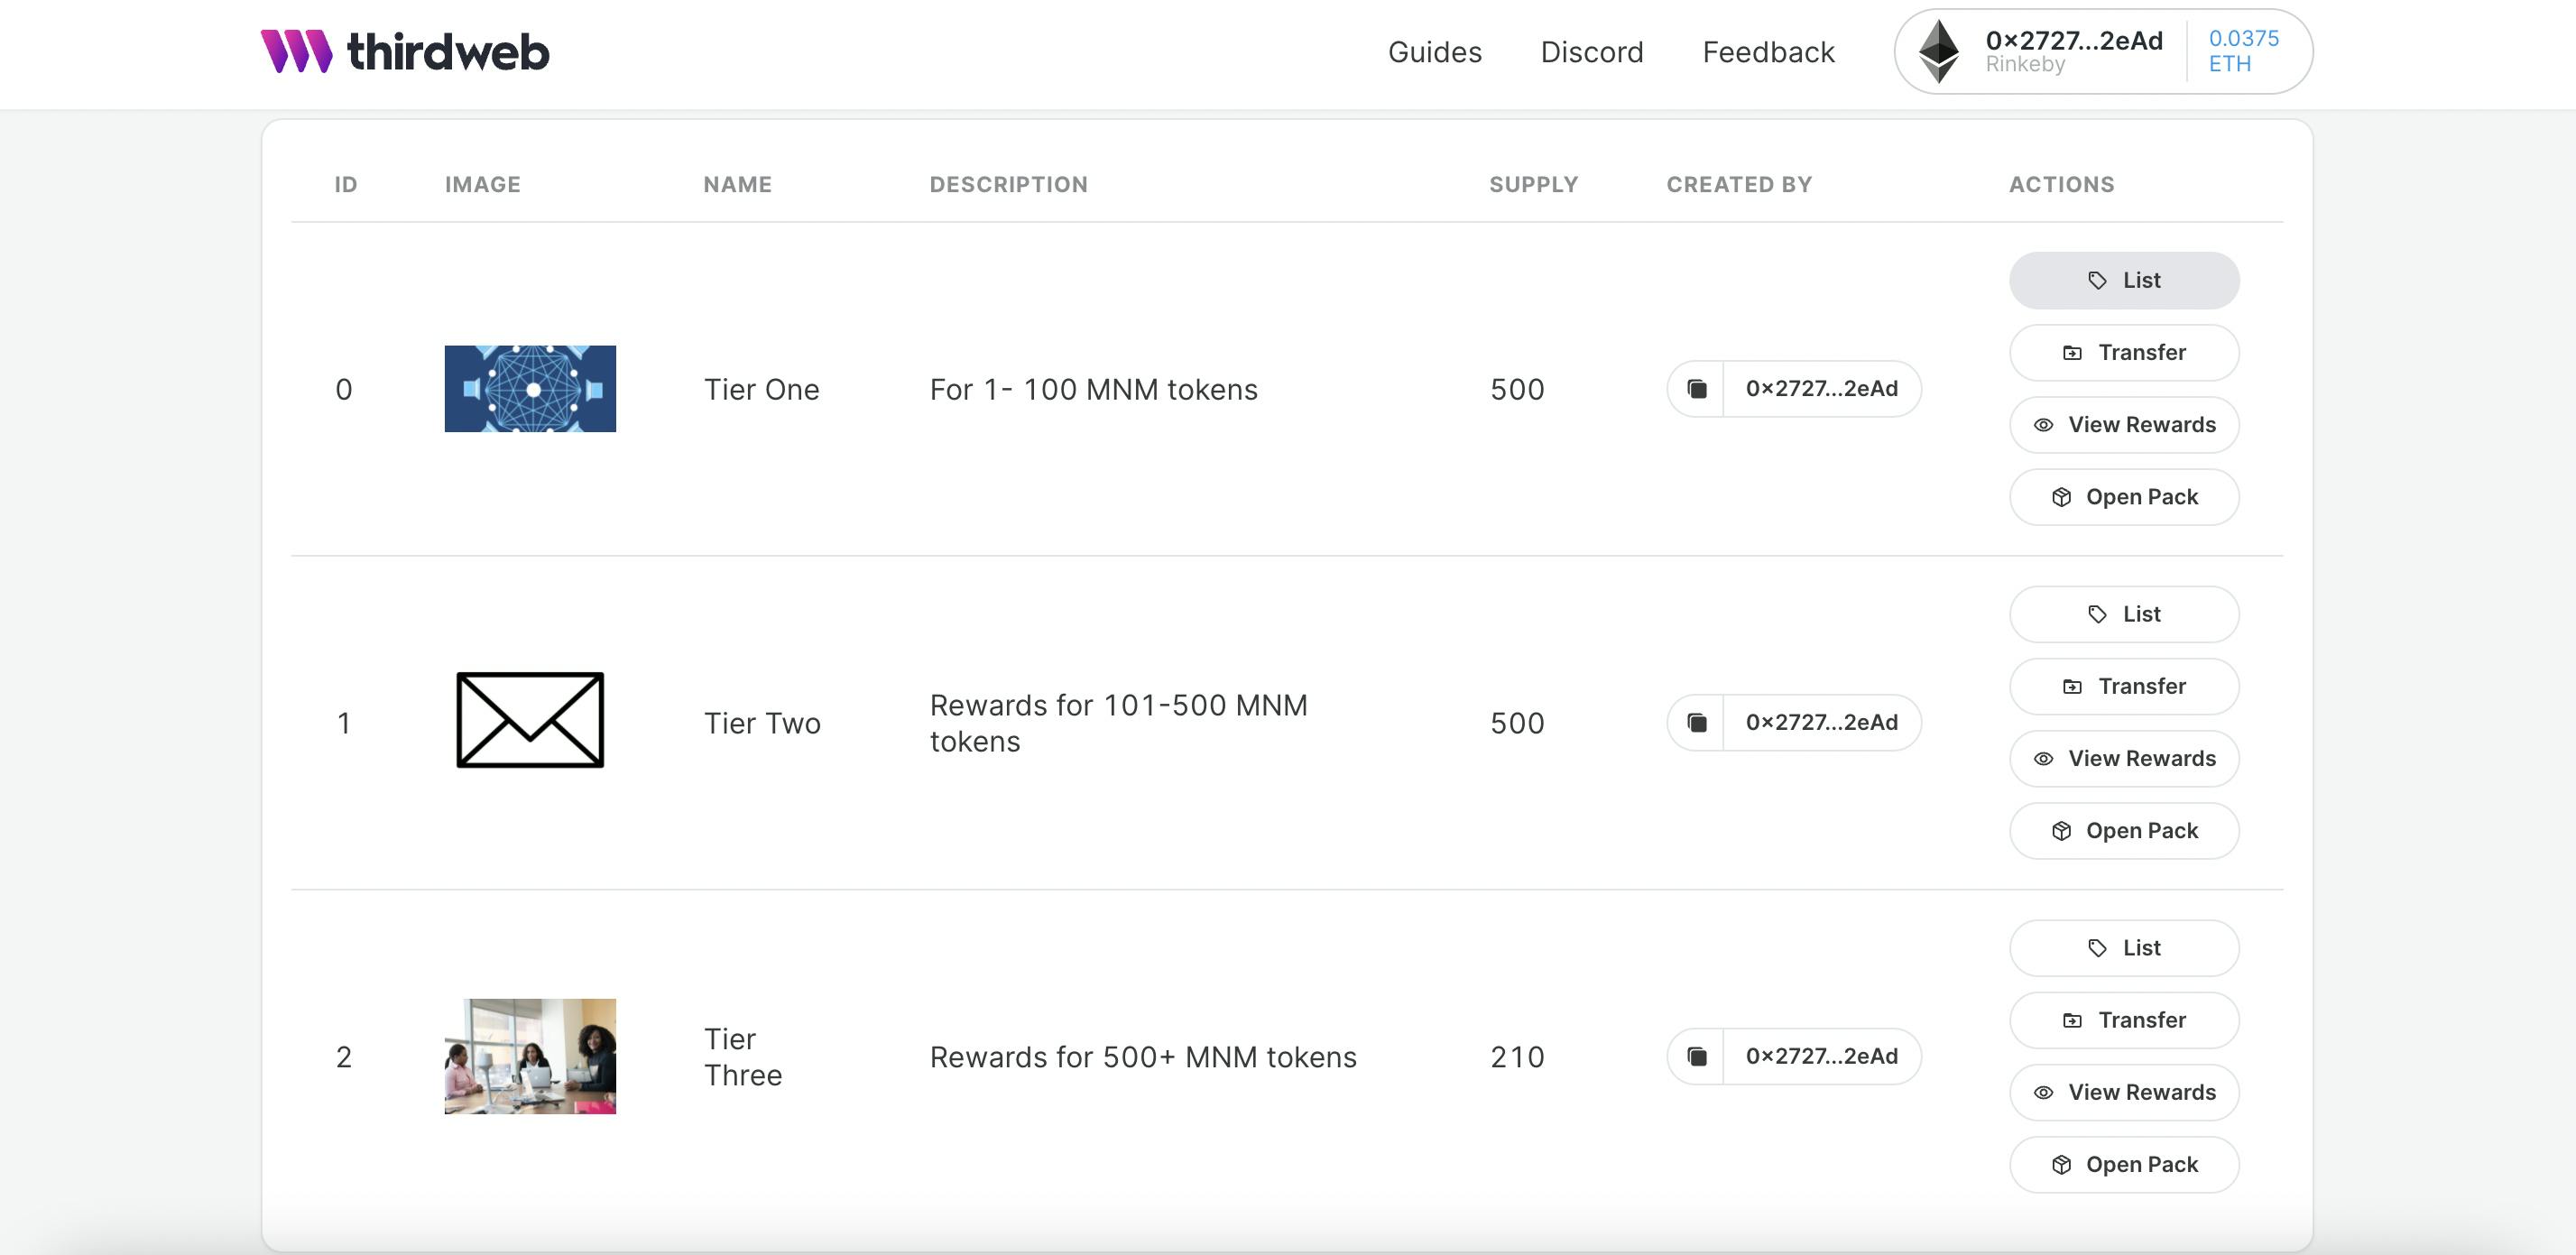
Give a name to the pack and optionally an image and a description then create the pack. Go ahead to repeat the process for the other two packs. We've come a long way, now let's break down what we've so far, We created:
- A token
- Created an NFT Lootbox
- NFT Bundles
- Individual NFTs
Now after creating the pack you'll get a warning from Thirdweb stating you need to deposit LINK to enable pack opening. LINK is used to ensure the Pack opens are genuinely random. Chainlink created Chainlink VRF (Verifiable Random Function) which is a provably-fair and verifiable source of randomness designed for smart contracts. Smart contract developers can use Chainlink VRF as a tamper-proof random number generator (RNG) to build reliable smart contracts for any applications which rely on unpredictable outcomes.
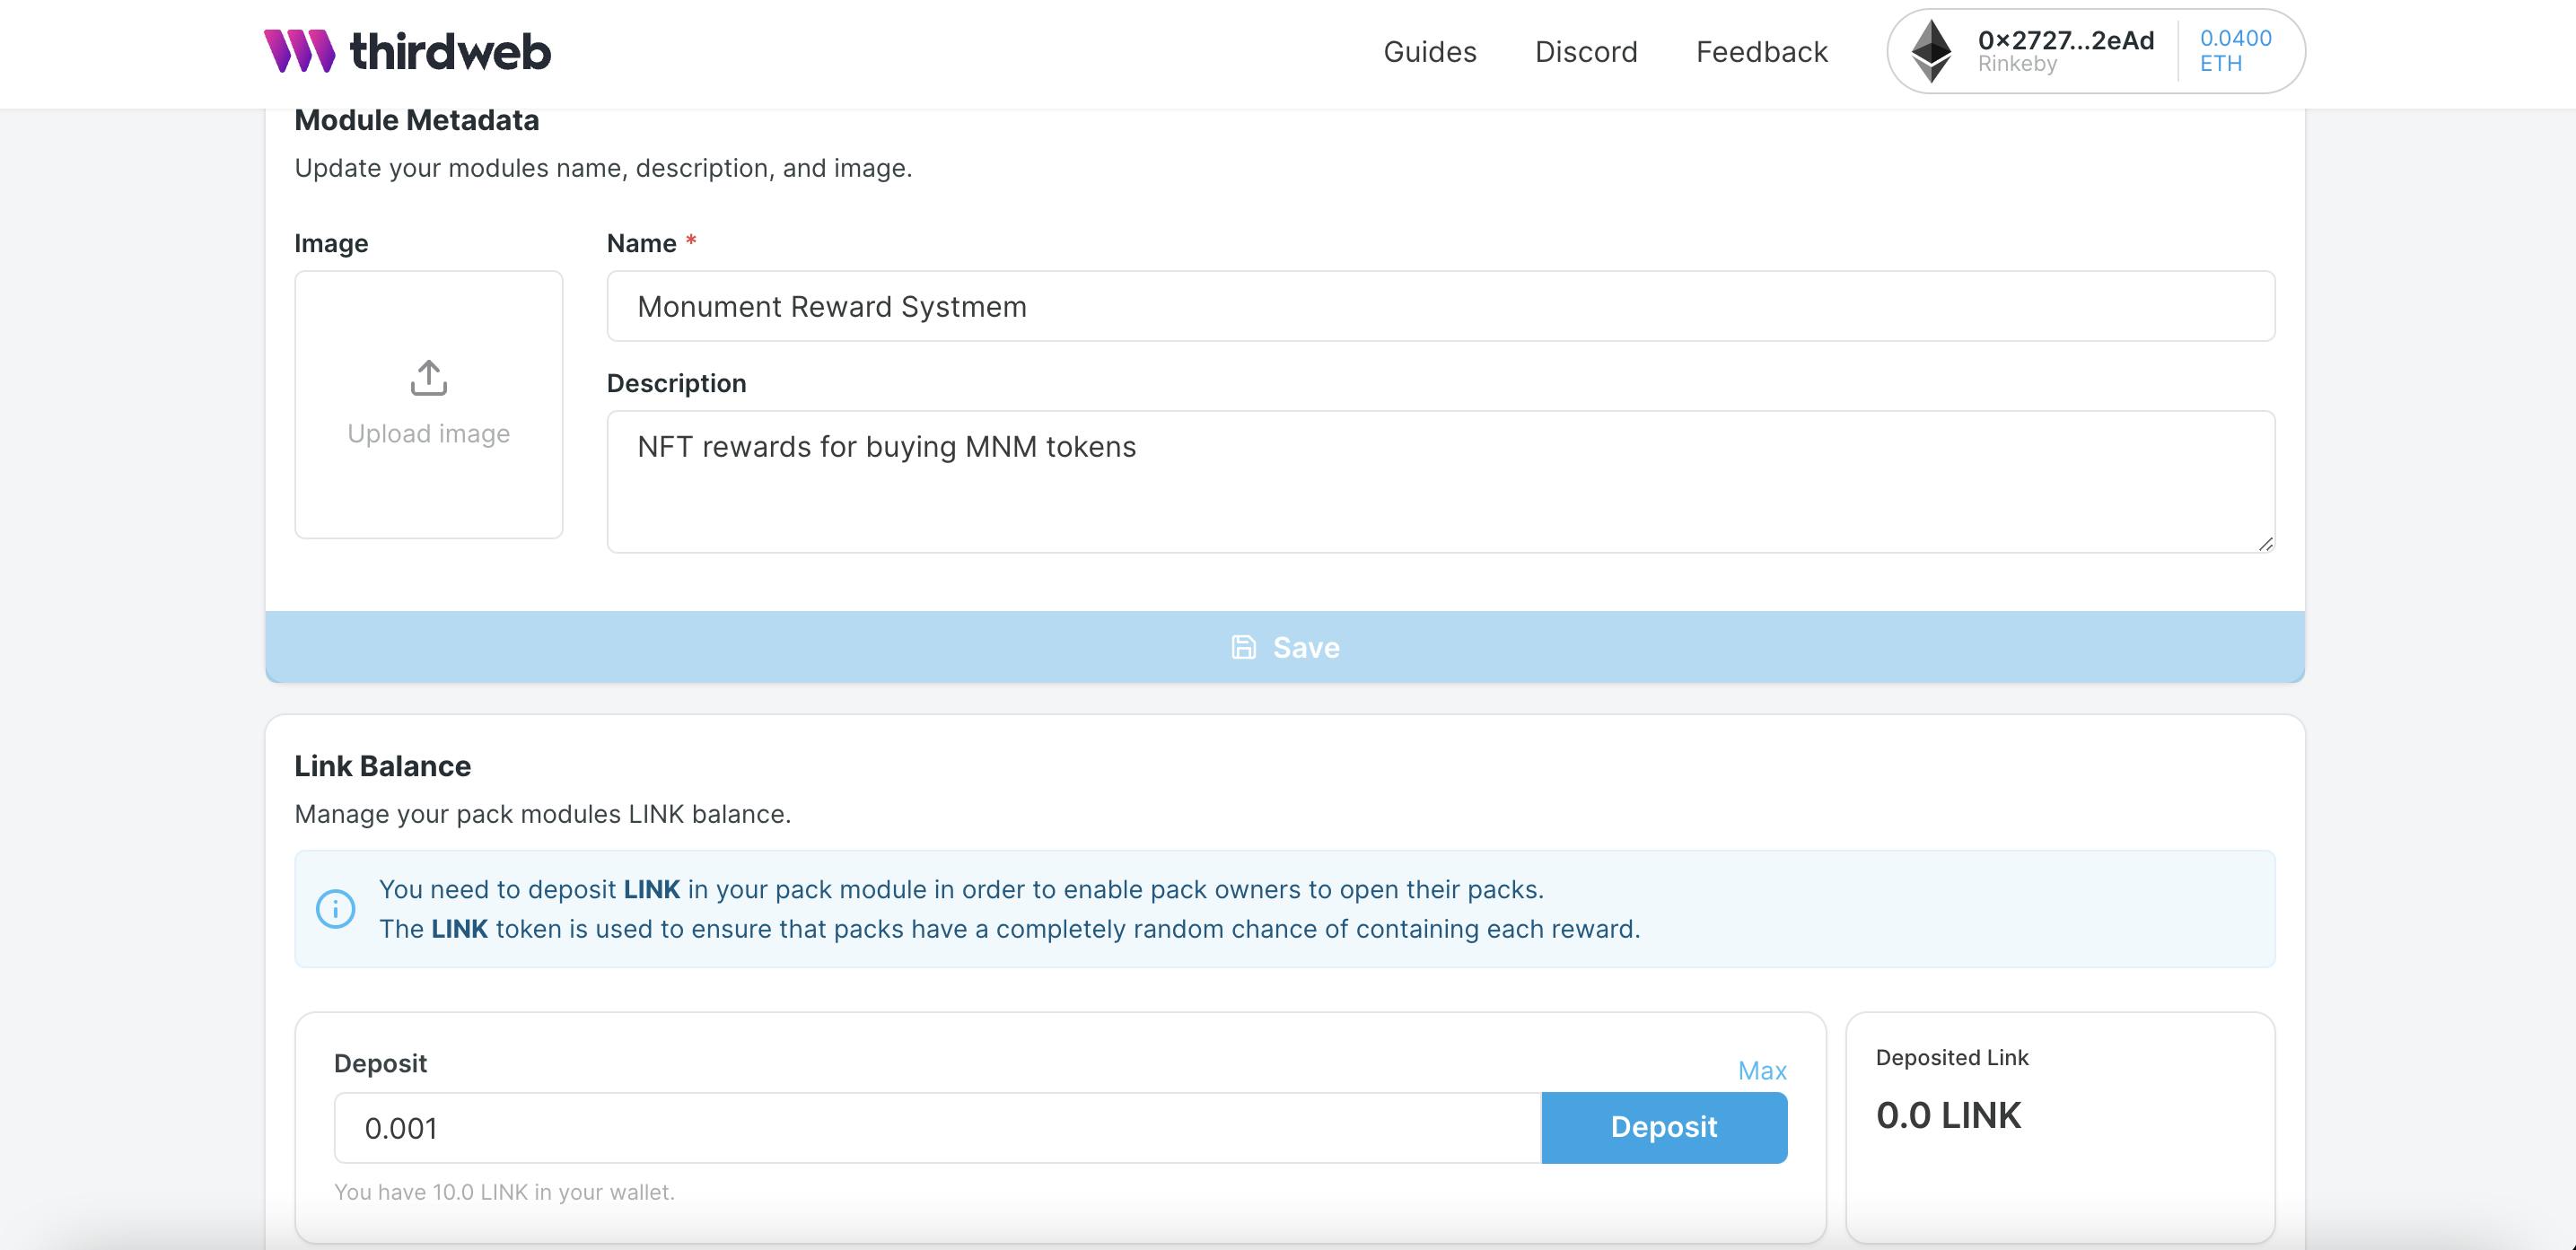
We already got 10 LINK when we requested some test ether from Chainlink Faucet, proceed to deposit 0.01 LINK to ensure our Lootbox are truly open at random. You can view the rewards for each pack. Imagine using a GUI to build out fully functional smart contracts with dealing the technicalities of solidity, it is truly amazing.
Front-end
For the front end we'll be using next js(npx create-next-app@latest --typescript). The front-end is very simple, the heavy lifting has been done by Thirdweb. The frontend will simply enable users connect their wallet, mint out token, get and view their NFT and gain access to special pages. Code can be found on GitHub.
Buy Token
Let's start with installing the necessary packages
npm install @3rdweb/sdk ethers

npm install @3rdweb/react @3rdweb/hooks

npm install @3rdweb/sdk ethers dotenv
helper.js
import { ThirdwebSDK } from "@3rdweb/sdk";
import ethers from "ethers";

// Read environment variables from .env
import dotenv from "dotenv";
dotenv.config();

const walletPrivateKey = process.env.WALLET_PRIVATE_KEY;

if (!walletPrivateKey) {
    console.error("Wallet private key missing")
    process.exit(1)
}

export const sdk = new ThirdwebSDK(
    new ethers.Wallet(
        process.env.WALLET_PRIVATE_KEY,
        // We are using Rinkeby Testnet
        ethers.getDefaultProvider("https://rinkeby.infura.io/v3/")
    ),
);

const appAddress = '0xa1c061c0E2F8dcb859CF33c4C3b0e2fF1E002129';
//Address of our project

export async function getApp() {
    const app = await sdk.getAppModule(appAddress);
    return app;
}
minter.js
const toAddress = "0x2727596741B57Fedb32Dc90989332E9CE1502eAd";

// The amount of this token you want to mint
const amount = ethers.utils.parseEther("50");

await module.mintTo(toAddress, amount);


const toAddress = "0x...";

// The amount of tokens you want to send
const amount = 0;

await module.transfer(toAddress, amount);
Unpack NFT
unpack.js
const packModuleAddress = "0xA224C3eEeA1790e7e44DD592cdd1a9dAF5A4aa88";
 const packModule = sdk.getPackModule(packModuleAddress);

 console.log("Opening the pack...");
 const opened = await packModule.open("0");
 console.log("Opened the pack!");
  console.log(opened);
View NFT
nft.js
const sdk = new ThirdwebSDK(provider);
const nftModule = sdk.getTokenModule("0xC31c37f983D1F5737608124637D238B1C4c4dD82");

const nfts = await nftModule.getAll();
console.log(nfts);

// Or you can get optionally get the NFTs owned by a specific wallet
const address = "0x2727596741B57Fedb32Dc90989332E9CE1502eAd"; // The address you want to get the NFTs for;
const ownedNfts = await nftModule.getAll(address);
console.log(ownedNfts);
Use NFT for Discord Membership
We'll be using the collab.land Discord bot. So each category ``Genin,ChuninandJonin``` will have a special channel for the holders of the NFT alone.
- Invite the bot into your server using this Invite.
- In the #collabland-config channel, send the message !setup role to set up a role based on NFT ownership.
- Choose the network which you used to mint your NFT's — whichever network you're connected to on thirdweb where you setup your Project and Module. (Rinkeby etc)
- select ⚖️ for Collection (ERC1155)
- Input the details of the NFT you'd like to grant access to the channel.
- contract address can be found in your dashboard under your NFT collection name. It looks like [0x4465...65E8] in the screenshot above.
- token id can be found at the top of each NFT. It looks like #0, #1, #2, etc.
##Conclusion We have successfully deployed a decentralised application🎉🎉🎉. Free feel to explore more on Thirdweb. Looking forward to see the awesome apps you create.